
Scunthorpe to Hull Bus Timetable PDF: A Comprehensive Guide (Updated 01/09/2026)
Finding a Scunthorpe to Hull bus timetable PDF for free is now easier than ever! Recent service increases in April 2024, detailed by Grimsby Telegraph and BBC News,
mean updated schedules are readily available.
These enhancements, connecting Scunthorpe, Barton, and Hull, offer more travel options for passengers.
The bus routes connecting Scunthorpe and Hull are vital transport links for commuters, students, and those visiting the region. These services, primarily operated by Stagecoach and East Yorkshire Buses, provide a cost-effective and convenient alternative to private vehicle travel. Historically, demand has fluctuated, but recent developments, as reported in April 2024, indicate a significant expansion of services to better cater to passenger needs.
The journey between Scunthorpe and Hull typically passes through Barton-upon-Humber, making it a key connection point for residents in that area. Understanding the timetable is crucial for efficient travel planning. While printed timetables are available at bus stations, accessing a Scunthorpe to Hull bus timetable PDF offers greater flexibility and accessibility. This guide aims to provide a comprehensive overview of how to find and interpret these timetables, ensuring a smooth and stress-free journey. The increased services aim to address previous concerns about frequency and capacity, particularly during peak hours.
Passengers should be aware that services can be subject to change, so regularly checking for updates is recommended.
Current Bus Operators on the Route
Currently, two primary bus operators serve the Scunthorpe to Hull route: Stagecoach and East Yorkshire Buses. Both companies offer varying routes and frequencies, contributing to a diverse network of transport options for passengers. Stagecoach generally focuses on direct routes, while East Yorkshire Buses may incorporate more local stops and variations along the way.
Understanding the specific services offered by each operator is key to selecting the most suitable journey. Accessing a Scunthorpe to Hull bus timetable PDF for each company is highly recommended, as schedules and route details differ significantly. Recent service expansions, highlighted in April 2024 news reports, have been implemented by both operators to improve connectivity, particularly between Scunthorpe, Barton-upon-Humber, and Hull.
These improvements aim to address increased demand and provide more convenient travel times. Passengers should note that service levels can be affected by factors such as traffic conditions and seasonal variations. Checking the latest timetables online or through operator-specific apps is crucial for accurate travel planning. Both Stagecoach and East Yorkshire Buses provide online resources for timetable access.

Stagecoach Services: Route Details and Frequency
Stagecoach operates direct services between Scunthorpe and Hull, typically prioritizing speed and efficiency. While specific route numbers may vary, Stagecoach generally provides a limited-stop service, focusing on major towns and transport hubs. Frequency is a key consideration; services usually run hourly during peak times, with reduced schedules in the evenings and on weekends.
To obtain the most accurate and up-to-date information, downloading a Stagecoach Scunthorpe to Hull bus timetable PDF is essential. This PDF will detail the precise route taken, including all designated stops, and the corresponding departure and arrival times. Recent service increases in April 2024, as reported by local news outlets, have likely impacted Stagecoach’s schedules, so an updated timetable is crucial.
Passengers can expect a comfortable journey with Stagecoach, as their fleet generally includes modern buses equipped with amenities like Wi-Fi and USB charging ports. However, it’s advisable to check the specific bus features when planning your trip. Real-time bus tracking is also available through the Stagecoach app, allowing passengers to monitor their bus’s location and estimated arrival time.
East Yorkshire Buses: Route Variations and Stops
East Yorkshire Buses provides several route variations connecting Scunthorpe and Hull, often catering to more local communities along the way. Unlike Stagecoach’s typically direct approach, East Yorkshire services may include more stops in smaller villages and towns, offering greater accessibility for residents. This can result in a slightly longer journey time, but provides a valuable service for those without direct access to main transport routes.
Finding a current East Yorkshire Scunthorpe to Hull bus timetable PDF is vital for planning your journey. These PDFs will outline the specific stops served by each route variation, allowing passengers to identify the most convenient boarding point. The April 2024 service improvements, highlighted in recent news reports, likely affect East Yorkshire’s schedules, making an updated timetable essential.
Passengers should note that East Yorkshire Buses may operate different types of buses on various routes. Checking the timetable PDF can sometimes indicate the type of bus expected, providing insight into available amenities. Utilizing East Yorkshire’s online resources or app can also provide real-time tracking and service updates, ensuring a smooth and informed travel experience.
Accessing the Scunthorpe to Hull Bus Timetable PDF
Locating a free Scunthorpe to Hull bus timetable PDF requires knowing where to look. While a single, universally accessible document can be elusive, several avenues provide access to the information. The primary sources are the official websites of the operating bus companies: Stagecoach and East Yorkshire Buses. These sites typically host downloadable PDFs, though navigation can sometimes be challenging.
Recent news regarding service increases in April 2024 emphasizes the importance of using an updated timetable. Older PDFs may contain inaccurate information. Third-party timetable websites and apps, while convenient, should be cross-referenced with the official sources to ensure accuracy. Be cautious of unofficial sites that may host outdated or incorrect schedules.
A direct Google search using keywords like “Scunthorpe to Hull bus timetable PDF” can yield results, but always verify the source’s legitimacy. Checking the publication date on the PDF is crucial. Remember that both Stagecoach and East Yorkshire Buses offer online journey planners which, while not a PDF, provide personalized timetable information based on your specific travel needs.
Official Stagecoach Website for Timetables
Stagecoach, a key operator on the Scunthorpe to Hull route, provides timetable information via its official website. However, directly locating a single, downloadable PDF for the entire route can be complex. Stagecoach often presents timetables as individual route listings or utilizes a journey planning tool instead of a comprehensive PDF.
To access timetables, navigate to the Stagecoach website and select the “Bus Timetables” or “Journey Planner” section. You may need to specify your starting point (Scunthorpe) and destination (Hull) to filter the results. Look for route numbers that serve the Scunthorpe-Hull corridor. Be aware that services connecting through Barton-upon-Humber may have separate timetables.
Given the April 2024 service increases, ensure you are viewing the most current timetable information. Stagecoach frequently updates its schedules, so checking the date of publication is vital; While a dedicated PDF might not always be available, the online journey planner offers real-time and personalized timetable data. Consider using the journey planner for the most accurate and up-to-date information, even if a PDF isn’t readily found.
East Yorkshire Buses Online Timetable Resources
East Yorkshire Buses also serves routes connecting Scunthorpe and Hull, and their website is a valuable resource for timetable information. Similar to Stagecoach, East Yorkshire Buses doesn’t always offer a single, downloadable PDF encompassing the entire Scunthorpe to Hull route. Instead, they typically provide timetables for individual services and utilize online journey planning tools.
To find the relevant timetables, visit the East Yorkshire Buses website and navigate to the “Timetables” or “Journey Planning” section. Input Scunthorpe as your origin and Hull as your destination. Pay close attention to route numbers and any variations that may serve different stops along the way, particularly those connecting via Barton-upon-Humber.
Considering the service improvements implemented in April 2024, verifying the timetable’s publication date is crucial. East Yorkshire Buses regularly updates its schedules to reflect changes in service frequency and route adjustments. While a consolidated PDF may be elusive, the online journey planner provides real-time information and allows for customized travel planning. Utilize this tool for the most accurate and current timetable details.
Third-Party Timetable Websites and Apps
Beyond the official Stagecoach and East Yorkshire Buses websites, several third-party platforms aggregate bus timetable information, potentially offering a convenient way to find Scunthorpe to Hull schedules. These resources often compile data from multiple operators, providing a comprehensive overview of available services.
Popular options include Traveline, Busbud, and Citymapper, though availability and accuracy can vary. These platforms frequently feature journey planning tools allowing users to input their origin and destination to generate route options and corresponding timetables. However, it’s essential to cross-reference the information with the official operator websites, especially given the April 2024 service increases.
Many of these sites and apps don’t offer downloadable PDF timetables directly, but they present the information in a user-friendly format. Be mindful that data may not always be updated immediately following service changes. Always confirm the timetable details with Stagecoach or East Yorkshire Buses to ensure accuracy before commencing your journey. Utilizing multiple sources can help ensure you have the most reliable information for your trip.
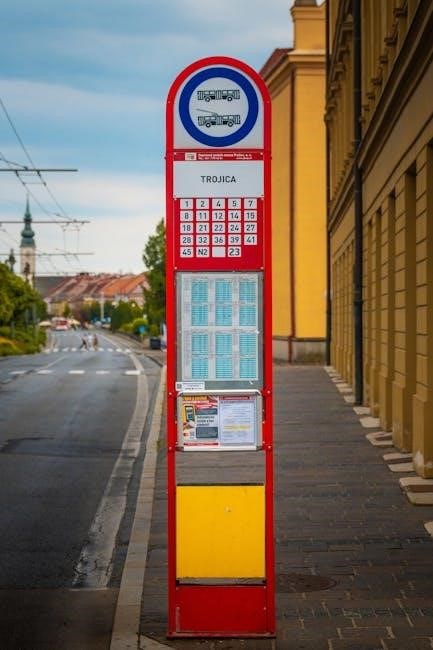
Understanding the Timetable Layout
Scunthorpe to Hull bus timetables, typically available as PDFs from Stagecoach and East Yorkshire Buses, follow a standardized layout designed for clarity. Generally, the timetable is presented as a table, with bus stops listed vertically along the left-hand side and time intervals horizontally across the top.
Departure times are the core element, indicating when the bus leaves each stop. Pay attention to whether times are displayed in 12-hour or 24-hour format. Saturday, Sunday, and Bank Holiday schedules are often presented separately, as services may differ from weekday timetables. Look for footnotes or key symbols explaining any specific conditions, such as “S” for school holidays or “X” for non-stop services.
Route numbers are prominently displayed, allowing you to quickly identify the correct service. Variations in route numbers may indicate different stopping patterns. The PDF may also include information on fare stages or zones. Understanding these elements is crucial for efficient journey planning, especially considering the recent service expansions announced in April 2024.

Key Information Included in the PDF Timetable

A comprehensive Scunthorpe to Hull bus timetable PDF will contain several vital pieces of information beyond just departure and arrival times. Expect to find a clear indication of the route number, essential for identifying the correct service, particularly with route variations. The timetable will specify whether the service operates daily, weekdays only, or on specific days, noting any differences for weekends and bank holidays.
Crucially, the PDF should detail all stops along the route, allowing passengers to pinpoint their boarding and alighting locations. Look for information regarding connecting services, especially those in Barton-upon-Humber, as highlighted by recent service improvements. Fare information, or at least guidance on where to find fare details, is also typically included.
Recent updates, like the April 2024 service increases reported by Grimsby Telegraph and BBC News, will be reflected with a date of validity clearly stated on the timetable. Finally, contact details for Stagecoach and East Yorkshire Buses are usually provided for inquiries or assistance.
Reading Departure and Arrival Times
Successfully navigating the Scunthorpe to Hull bus timetable PDF hinges on understanding how departure and arrival times are presented. Typically, times are displayed in a grid format, with columns representing each bus stop along the route. Departure times indicate when the bus leaves a specific stop, while arrival times show when it’s scheduled to reach the next destination.
Pay close attention to the use of AM and PM designations to avoid confusion. Timetables often differentiate between weekday and weekend schedules, so ensure you’re viewing the correct day’s information. Look for any notes or symbols accompanying specific times; these might indicate a limited-stop service or a route variation. Remember that recent service increases in April 2024, as reported by sources like the Grimsby Telegraph, may have altered some timings.

If a time is shown as ‘approximate’, it’s subject to traffic conditions and other unforeseen delays. Always allow ample time for your journey, especially during peak hours. Cross-referencing with real-time tracking apps (discussed later) can provide up-to-the-minute accuracy.
Identifying Bus Stop Locations
Locating bus stops accurately is crucial when using the Scunthorpe to Hull timetable PDF. The PDF will typically list all stops served along the route, often in sequential order. Each stop is usually identified by its official name, which may differ from commonly used local names.

Pay attention to any additional details provided alongside the stop name, such as the street address or nearby landmarks. Some timetables include a map showing the approximate location of each stop. Utilize online mapping services (like Google Maps) to pinpoint the exact stop location if the PDF’s information is insufficient.
Remember that recent service expansions, highlighted in April 2024 news from the Grimsby Telegraph, might include newly added stops. These may not be immediately obvious on older versions of the timetable. Look for any symbols or notes indicating stops that are ‘request stops’ – meaning you need to signal the driver to stop. Familiarizing yourself with the stop locations beforehand will ensure a smoother journey.
Consider using real-time tracking apps to confirm the bus’s current location and estimated arrival time at your chosen stop.
Understanding Route Numbers and Variations
Decoding route numbers and variations is key to navigating the Scunthorpe to Hull bus services effectively. The timetable PDF will clearly display the route number for each service – typically a numerical designation. However, be aware that some routes may have variations, indicated by letters or additional numbers appended to the main route number.
These variations signify differences in the route taken, stops served, or destinations. For example, a route might have a ‘A’ variation that serves a different industrial estate or a ‘B’ variation that terminates at a specific location. The April 2024 service increases, reported by the BBC and Grimsby Telegraph, may have introduced new route variations.
Carefully examine the timetable PDF to understand which stops are served by each variation. Pay attention to any notes or legends explaining the meaning of the different variations. If unsure, consult the official Stagecoach or East Yorkshire Buses websites for clarification. Confirming the correct route variation ensures you reach your intended destination without unnecessary detours.
Utilize online journey planners to input your starting point and destination, specifying the correct route number and variation for accurate results.
April 2024 Service Increases: A Detailed Look
The April 2024 service increases between Scunthorpe, Barton-upon-Humber, and Hull represent a significant improvement in local bus connectivity. Reports from both the Grimsby Telegraph and the BBC highlighted these enhancements, aimed at providing more frequent and convenient travel options for commuters and residents. These changes are reflected in the updated Scunthorpe to Hull bus timetable PDF, now readily available online.
The primary focus of the service increases was to address peak-time demand and improve accessibility to key destinations. This involved adding extra journeys during rush hour and extending the operating hours of certain routes. Specifically, the increases aimed to better serve industrial areas and connect Barton-upon-Humber more effectively to both Scunthorpe and Hull.
Passengers can expect to see a more reliable and frequent service, particularly on routes connecting these three towns. The timetable PDF details the new departure and arrival times, allowing passengers to plan their journeys accordingly. These improvements are designed to encourage greater use of public transport and reduce reliance on private vehicles. Checking the latest PDF is crucial to benefit from these changes.
Impact of New Services on Travel Options
The April 2024 service enhancements have dramatically broadened travel options for those commuting between Scunthorpe, Barton-upon-Humber, and Hull. Previously, limited frequencies, particularly during off-peak hours, posed challenges for passengers. The increased services, detailed in the updated Scunthorpe to Hull bus timetable PDF, now offer greater flexibility and convenience.
For commuters, the additional journeys during peak times alleviate overcrowding and reduce waiting times. Residents of Barton-upon-Humber now benefit from improved connections to both Scunthorpe’s industrial areas and Hull’s city centre, opening up employment and leisure opportunities. The expanded timetable allows for more spontaneous travel and reduces the need for pre-planning around limited bus schedules.
Furthermore, the increased frequency encourages a shift towards public transport, potentially easing congestion on local roads. Access to the free Scunthorpe to Hull bus timetable PDF empowers passengers to make informed decisions and optimize their travel plans. These improvements collectively contribute to a more accessible and sustainable transport network for the region, benefiting both daily commuters and occasional travellers.
Barton-upon-Humber Connections
Barton-upon-Humber has seen a significant boost in transport connectivity thanks to the recent service increases between Scunthorpe and Hull. The updated Scunthorpe to Hull bus timetable PDF clearly illustrates improved frequency and direct routes serving the town, making travel more convenient for residents. Previously, reaching Scunthorpe or Hull from Barton often involved changes or lengthy journeys.
The enhanced services now provide a more seamless link, particularly beneficial for those commuting to work or accessing essential services in either town. Students travelling to further education colleges in Hull, or individuals seeking employment opportunities in Scunthorpe’s industrial areas, will find the improved connections invaluable. The availability of a free Scunthorpe to Hull bus timetable PDF allows Barton residents to easily plan their journeys.

These improvements aren’t merely about frequency; they also represent a commitment to integrating Barton more fully into the wider transport network. The increased accessibility fosters economic growth and social inclusion, enabling residents to participate more fully in regional life. Regular timetable checks, using the downloadable PDF, are recommended to stay informed of any service updates.
Ticket Options and Pricing
Understanding the various ticket options available for the Scunthorpe to Hull bus route is crucial for cost-effective travel. While specific pricing details aren’t directly available within the timetable PDF itself, both Stagecoach and East Yorkshire Buses offer a range of fares to suit different needs. These typically include single tickets, day tickets, return tickets, and longer-term passes.
For frequent travellers, weekly or monthly passes can represent significant savings compared to purchasing individual tickets. Students and senior citizens may also be eligible for discounted fares, requiring valid identification at the time of purchase. It’s advisable to check the official Stagecoach and East Yorkshire Buses websites for the most up-to-date pricing information, as fares are subject to change.
Purchasing tickets in advance online can sometimes offer discounts, and mobile ticketing options are increasingly available for added convenience. The Scunthorpe to Hull bus timetable PDF, while not detailing prices, facilitates journey planning, allowing you to determine the best ticket type based on your travel requirements. Exploring both operator’s websites will reveal the most economical choice for your specific journey.
Where to Purchase Tickets: Online, On-Bus, and Retail Outlets
Passengers travelling between Scunthorpe and Hull have multiple convenient options for purchasing bus tickets. Both Stagecoach and East Yorkshire Buses prioritize accessibility in ticket procurement. The most modern method is through online platforms – each operator’s website and potentially mobile apps allow for advance ticket purchase, often with digital ticketing directly onto smartphones.
For those preferring traditional methods, on-bus ticket purchase is readily available on most services. However, exact change is often required, and contactless payment options are becoming increasingly widespread. Additionally, both companies utilize retail outlets throughout Scunthorpe and Hull. These can include travel centres, newsagents, and designated ticket agents, providing a physical location for purchases.
Checking the specific operator’s website is recommended to locate nearby retail partners. While the Scunthorpe to Hull bus timetable PDF doesn’t directly facilitate ticket buying, it aids in planning, allowing you to determine the best purchase method based on your journey and preferred payment style. Utilizing a combination of these options ensures a smooth and hassle-free travel experience.
Accessibility Information for Passengers
Stagecoach and East Yorkshire Buses are committed to providing accessible transportation between Scunthorpe and Hull. Both operators strive to accommodate passengers with disabilities and varying needs. Low-floor buses are increasingly common on the route, facilitating easier boarding for wheelchair users and those with mobility impairments. Dedicated wheelchair spaces are typically available, though pre-booking may be advisable during peak times to guarantee availability.
Audio-visual announcements are standard on many services, providing clear information about stops and route updates for passengers with visual or hearing impairments. Priority seating is designated for elderly, pregnant, and disabled passengers. Assistance with boarding and alighting can be requested from the driver, and staff are trained to provide support where possible.
While the Scunthorpe to Hull bus timetable PDF doesn’t detail specific accessibility features for each journey, contacting Stagecoach or East Yorkshire Buses directly is recommended for detailed information regarding a particular service. Their websites offer dedicated accessibility sections with comprehensive details on available provisions and assistance options. This ensures a comfortable and inclusive travel experience for all passengers.
Contact Information for Stagecoach and East Yorkshire Buses
For inquiries regarding the Scunthorpe to Hull bus services, including the timetable PDF, contacting Stagecoach and East Yorkshire Buses directly is essential. Stagecoach East Midlands can be reached via their customer service helpline at 01777 838000. Alternatively, visit their website at www.stagecoachbus.com for online support and frequently asked questions.
East Yorkshire Buses can be contacted through their customer service team at 01482 592929. Their website, www.eastyorkshirebuses.co.uk, provides a wealth of information, including route maps, timetable downloads, and a dedicated contact form for specific queries. Both operators also maintain active social media presences on platforms like Facebook and Twitter, offering a convenient channel for quick updates and assistance.
When contacting either company, having details such as the route number and date of travel will expedite the process. For issues encountered during a journey, noting the bus registration number is also helpful. These contact details are crucial for obtaining the most up-to-date information on the Scunthorpe to Hull bus timetable PDF and any service alterations;
Real-Time Bus Tracking and Updates
Staying informed about the real-time location of buses on the Scunthorpe to Hull routes is now incredibly convenient, supplementing the static timetable PDF. Both Stagecoach and East Yorkshire Buses offer sophisticated tracking tools for passengers. Stagecoach utilizes a dedicated app, available for both iOS and Android devices, allowing users to pinpoint bus locations on a live map and receive estimated arrival times.

East Yorkshire Buses also provides real-time tracking through their own mobile app and website. Passengers can input their bus stop or route number to view accurate, up-to-the-minute information. Furthermore, both companies actively utilize social media platforms, particularly Twitter, to disseminate service updates, including delays, diversions, and cancellations.
These real-time updates are invaluable, especially considering potential disruptions due to traffic or unforeseen circumstances. Several third-party apps, such as Bus Checker and Moovit, also integrate data from both operators, offering a consolidated view of bus movements. Utilizing these resources ensures passengers have the most current information, even beyond the details provided in the Scunthorpe to Hull bus timetable PDF.