Preparing divorce paperwork in Louisiana can be complex, requiring accurate forms and detailed information. Official documents ensure legal compliance, while free PDF templates simplify the process for uncontested cases.
Overview of Divorce in Louisiana
In Louisiana, divorce proceedings involve legal steps to dissolve a marriage, requiring specific forms and adherence to state laws. The process can be contested or uncontested, with uncontested divorces being faster and less complex. Legal grounds for divorce in Louisiana include living separate and apart for at least 180 days. The state also recognizes no-fault divorces, where the marriage is deemed irretrievably broken. Residency requirements mandate that at least one spouse must live in Louisiana for at least six months before filing. While free printable divorce forms are available online, they may vary by parish, and not all forms are universally applicable. Consulting legal resources or professionals is often recommended to ensure accuracy and compliance with local regulations.
Importance of Using Official Divorce Papers
Using official Louisiana divorce papers ensures legal compliance and avoids delays in the process. These documents are specifically designed to meet state requirements, reducing the risk of errors or rejections. Official forms provide clear guidelines, helping individuals accurately complete and file their paperwork. They also ensure that all necessary information is included, such as property division, child custody, and support details. Court-approved templates are essential for a smooth and efficient divorce process. While free printable forms are available, they must be verified for accuracy and relevance to the specific case. Properly completed official papers facilitate court approval and the finalization of the divorce decree, ensuring a legally binding outcome.

Required Divorce Forms in Louisiana
Louisiana requires specific forms, including the Petition for Divorce, Marital Settlement Agreement, Child Custody and Support Forms, and Property Division Forms, to facilitate a legal divorce process.

Petition for Divorce
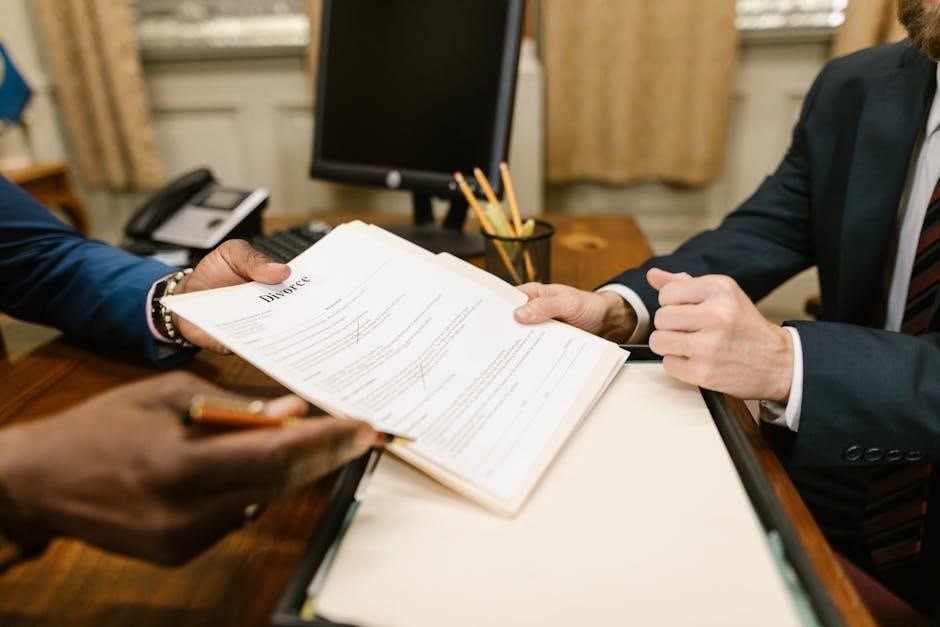
The Petition for Divorce is the initial document filed to begin the divorce process in Louisiana. It outlines the grounds for divorce, such as living separate and apart for over 180 days, as per Civil Code Article 103(1). This form must include essential details like the names and addresses of both spouses, marriage date, and the reason for seeking a divorce. Accurately completing this petition is crucial, as it sets the foundation for the entire legal process. Ensure all information is correct to avoid delays. Legal advice is recommended to navigate this step effectively and comply with Louisiana’s specific requirements.
Marital Settlement Agreement
A Marital Settlement Agreement (MSA) is a critical document in Louisiana divorces, outlining the division of property, assets, and liabilities between spouses. It also addresses child custody, visitation, and support arrangements if applicable. This agreement must be detailed and fair to both parties, ensuring clarity on all financial and parental responsibilities. While couples can create an MSA themselves, legal assistance is recommended to avoid disputes and ensure compliance with state laws. The agreement must be signed by both parties and notarized to be legally binding. Once approved by the court, it becomes part of the final divorce decree, providing a clear framework for post-divorce arrangements.

Child Custody and Support Forms
Child custody and support forms are essential in Louisiana divorces involving minors. These documents establish legal custody, visitation rights, and financial support obligations. Parents must provide detailed information about their income, expenses, and living arrangements to determine fair support amounts. Louisiana uses specific guidelines to calculate child support, ensuring consistency and fairness. Forms may include custody agreements, support calculations, and parenting plans. Both parents must sign these documents, which are then reviewed and approved by the court. Accurate completion of these forms is crucial to protect the best interests of the child and comply with state laws. Legal assistance is recommended to navigate this complex process effectively.
Property Division Forms
Property division forms are critical in Louisiana divorces to legally separate marital assets and debts. These documents outline how property, including real estate, vehicles, and personal belongings, will be divided between spouses. Louisiana follows community property laws, meaning assets acquired during marriage are generally split equally. Forms require detailed information about each spouse’s assets, liabilities, and personal property. Both parties must agree on the division or the court will intervene. The forms ensure transparency and fairness, preventing future disputes. Accurate completion is essential to reflect the true value of all possessions. Legal assistance is recommended to navigate complex cases, especially when high-value assets or disagreements arise. Properly executed forms help finalize the division smoothly.

How to Obtain Louisiana Divorce Papers PDF
Obtain Louisiana divorce papers PDF through official websites, free printable templates, or online services. Ensure accuracy by downloading from trusted sources for a smooth process.
Free Printable Divorce Forms Online

Free printable Louisiana divorce forms are readily available online, offering a cost-effective solution for uncontested cases. Websites provide downloadable PDF templates tailored to state requirements, ensuring compliance. These forms include petitions, settlement agreements, and child custody documents, streamlining the process. Many platforms offer DIY options with step-by-step instructions, making it easier for individuals to prepare without legal assistance. However, parish-specific variations may require additional verification. Downloading from trusted sources ensures accuracy and court approval. This convenient option simplifies document preparation, allowing couples to proceed efficiently with their divorce filing.

Downloading Forms from Official Sources
Downloading divorce forms from official sources ensures accuracy and compliance with Louisiana’s legal requirements. The state offers free, court-approved templates through its judicial website, specifically designed for uncontested cases. These forms include the Petition for Divorce, Marital Settlement Agreement, and Child Custody and Support Forms. Parish-specific forms are also available, though they may vary slightly. Official sources guarantee that the documents meet legal standards, reducing the risk of errors. By downloading directly from trusted websites, individuals can avoid unauthorized modifications and ensure their paperwork is accepted by the court. This method is reliable and recommended for those seeking a straightforward divorce process in Louisiana.

Using Online Divorce Services
Online divorce services offer a convenient and efficient way to obtain Louisiana divorce papers in PDF format. These platforms provide court-ready, personalized forms tailored to your specific case. Many services include step-by-step instructions, ensuring accuracy and compliance with state laws. They often cater to uncontested divorces, offering templates for the Petition for Divorce, Marital Settlement Agreement, and other necessary documents. Some services also provide legal reviews or support, adding an extra layer of assurance. While these platforms simplify the process, they are best suited for straightforward cases; For complex situations involving disputes or unique circumstances, consulting an attorney is recommended to ensure all legal requirements are met. Online divorce services can save time and reduce the hassle of paperwork, making the process more accessible and efficient for many individuals in Louisiana.
Filing Divorce Papers in Louisiana
Filing divorce papers in Louisiana requires accuracy and compliance with state laws. Ensure all documents are complete and meet legal standards before submitting them to the court.
Step-by-Step Filing Process
Filing divorce papers in Louisiana involves several structured steps. First, ensure all required forms are completed accurately and signed. Next, submit the documents to the appropriate court clerk’s office in the parish where the divorce is filed. The clerk will review and process the paperwork, assigning a case number. After filing, the spouse must be legally served the documents, typically via certified mail or a process server. Once served, the spouse has a specified period to respond. If uncontested, the court may finalize the divorce without a hearing. If contested, a court appearance may be necessary. Finally, the court will review the case and issue a divorce decree, legally ending the marriage.
Filing Fees and Requirements
Filing divorce papers in Louisiana involves specific fees and requirements. The filing fee typically ranges between $200 to $400, depending on the parish, and covers court costs and document processing. Additional fees may apply for services like document serving or expedited processing. To file, at least one spouse must meet Louisiana’s residency requirements, having lived in the state for at least six months and in the filing parish for a minimum of three months. The completed petition and supporting forms must be submitted to the court clerk’s office. Proof of residency, identification, and marriage certificate may also be required. Failure to meet these requirements can delay the process. Ensuring all documents are accurate and complete is crucial for a smooth filing experience.
Legal Requirements for Divorce in Louisiana
Louisiana requires at least one spouse to reside in the state for six months and the filing parish for three months. Grounds for divorce include living separately for over 180 days without reconciliation.
Residency Requirements
In Louisiana, at least one spouse must reside in the state for six months and within the filing parish for three months before initiating divorce proceedings. This ensures jurisdiction and proper legal standing. The residency requirement is a critical step to meet before filing divorce papers, as it determines the appropriate court for the case; Failure to comply may result in dismissal or delays. Spouses must provide proof of residency, such as a valid driver’s license, utility bills, or lease agreements, to satisfy this legal obligation. Meeting residency requirements is essential for a smooth and lawful divorce process in Louisiana.
Grounds for Divorce
Louisiana recognizes both no-fault and fault-based grounds for divorce. No-fault divorce is based on the irretrievable breakdown of the marriage, with spouses living separate and apart for at least 180 days. Fault-based grounds include adultery, abuse, or felony conviction. The grounds must be clearly stated in the divorce petition to ensure legal validity. Choosing the correct grounds is crucial, as it may impact property division, support, and custody arrangements. Proper documentation and evidence are required to support fault-based claims. Understanding the applicable grounds helps streamline the divorce process and ensures compliance with Louisiana’s legal standards. Accurate grounds are essential for a valid and enforceable divorce decree.

Completing the Divorce Papers
Accurately fill out all required fields, ensuring essential information like personal details, marriage dates, and property details are correct. Signatures and notarization are mandatory for court approval.
Essential Information to Include
When completing Louisiana divorce papers, ensure all required details are accurately provided. Personal information, such as names, addresses, and Social Security numbers, must be included. Marriage details, including the date and place of marriage, are necessary. Property division, assets, and liabilities should be clearly outlined. If applicable, child custody arrangements, support amounts, and visitation schedules must be specified. Additionally, the grounds for divorce, as per Louisiana law, should be stated. All financial information, such as income and expenses, must be disclosed. Ensure all data is truthful and verifiable, as inaccuracies can delay the process. Organize the information logically to avoid confusion and ensure compliance with legal standards.
Signatures and Notarization
Signatures and notarization are critical steps in finalizing Louisiana divorce papers. Both parties must sign the documents in the presence of a notary public to authenticate the agreement. The notary verifies the identities of the signatories and ensures they are signing voluntarily. Proper notarization prevents legal challenges and ensures the documents are court-ready. In cases where one party is unavailable, specific procedures may apply. Always follow Louisiana’s notarization requirements to avoid delays. Ensure all signatures are clear and legible, as illegible signatures can lead to rejection. Notarized documents are essential for court approval, making this step indispensable in the divorce process. Failure to comply may result in the court deeming the paperwork invalid.
Role of the Court in Divorce Proceedings
The court reviews and approves divorce documents, ensuring all legal requirements are met. It verifies the accuracy of submitted paperwork and issues the final divorce decree.
Court Review and Approval
The court plays a crucial role in reviewing and approving divorce papers in Louisiana. Once the paperwork is filed, the court verifies the accuracy of the submitted documents, ensuring all legal requirements are met. This includes checking the residency of the filing party, the grounds for divorce, and the completeness of the forms. If everything is in order, the court approves the divorce, leading to the issuance of a final divorce decree. The court’s review process ensures that the divorce is legally valid and enforceable. This step is essential for both parties to officially end their marriage and move forward with separate legal statuses.
Finalizing the Divorce Decree
Finalizing the divorce decree in Louisiana marks the official end of the marriage. After the court approves the paperwork, a final decree is issued, outlining the terms agreed upon by both parties. This document includes details on property division, child custody, and support arrangements. Once signed by the judge, the decree is legally binding and enforceable. It is essential to ensure all terms are clearly stated and agreed upon before the decree is finalized. The final divorce decree serves as official proof that the marriage has been dissolved, allowing both parties to legally remarry and move forward independently. Proper documentation and court approval are critical to ensure the process is completed smoothly and efficiently.

Finalizing a divorce in Louisiana requires accurate paperwork and legal compliance. Using official PDF templates ensures a smooth process, while seeking legal advice can provide additional support and clarity.
Next Steps After Filing
After filing Louisiana divorce papers, the court reviews the documents to ensure accuracy and completeness. A 30-day waiting period typically applies, during which the divorce cannot be finalized. The spouse must be served with the paperwork, and both parties may need to attend a court hearing. If the divorce is uncontested, the process is usually quicker. Once all requirements are met, the court issues a final divorce decree, legally ending the marriage. It’s important to follow up with the court to confirm the status and receive the official decree. Proper documentation and adherence to legal procedures ensure a smooth transition to post-divorce life.
Seeking Legal Assistance
Seeking legal assistance is crucial for navigating the complexities of Louisiana divorce proceedings. An experienced attorney can guide you through the legal process, ensuring all forms are correctly completed and filed. They can also represent you in court, especially in contested cases or when disputes arise over property, custody, or support. Legal professionals can help you understand your rights and obligations under Louisiana law. Additionally, they can assist with negotiations and mediations to reach a fair settlement. For those who cannot afford legal representation, resources like legal aid services or pro bono attorneys may be available. Consulting a lawyer ensures your interests are protected and the divorce process is handled efficiently and effectively.