
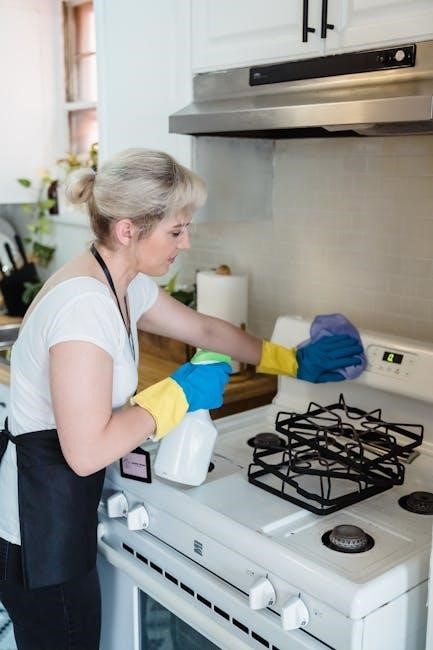
The GE stove’s self-cleaning feature simplifies oven maintenance by using high heat to burn food residue․ Models like JB645DKWW and JGB660 offer this convenient cleaning option․ Always follow the owner’s manual for safe operation․
1․1 What is Self-Cleaning Oven Technology?
Self-cleaning oven technology uses high heat to burn food residue into ash, simplifying cleanup․ GE stoves equipped with this feature heat to extreme temperatures (typically 800°F–1000°F) during the cleaning cycle․ This process reduces food spills and grime to a manageable residue, which can then be wiped away․ The oven door locks during cleaning to ensure safety․ Before starting, users must remove racks, pans, and utensils, as some items may warp or release harmful fumes․ The self-cleaning function is energy-intensive but effective for maintaining oven hygiene․ Always consult the owner’s manual for model-specific instructions and safety guidelines․
1․2 Benefits of Using the Self-Cleaning Mode
Using the self-cleaning mode on your GE stove offers several advantages․ It eliminates the need for harsh chemicals by relying on high heat to burn food residue into ash․ This method is time-saving, as it reduces manual scrubbing efforts․ The process also ensures a deeper clean, targeting tough grime and spills that regular cleaning might miss․ Additionally, it helps maintain the oven’s appearance by removing stubborn stains and odors․ Regular use of the self-cleaning feature can extend the oven’s lifespan by preventing residue buildup․ Always follow the owner’s manual for specific guidance tailored to your stove model․
Safety Information and Precautions
Ensure the oven is empty of cookware and utensils before self-cleaning․ Wipe up spills beforehand to prevent smoke․ If the mode malfunctions, disconnect power and seek professional help․
2․1 General Safety Guidelines
To ensure safe operation of the GE stove’s self-cleaning feature, always follow these guidelines:
- Remove all cookware, utensils, and racks from the oven before starting the cycle․
- Wipe up excess food spills to minimize smoke during cleaning․
- If the self-cleaning mode malfunctions, turn off the oven and disconnect power immediately․
- Keep children away from the oven during the self-cleaning process․
- Ensure proper ventilation in the kitchen to avoid fume buildup․
- Never use abrasive cleaners or scouring pads after self-cleaning․
- Only clean parts listed in the owner’s manual to avoid damage․
Adhering to these guidelines ensures a safe and effective cleaning experience․
2;2 Preparing the Oven for Self-Cleaning
Before activating the self-cleaning mode, prepare the oven to ensure a safe and effective process:
- Remove all racks, shelves, and cookware to prevent damage during high heat․
- Wipe up large food particles with a damp cloth to reduce smoke․
- Place foil or a drip pan on the floor to catch debris․
- Ensure the oven is cool to the touch before starting the cycle․
- Optional: Clean racks and shelves separately with soap and water before the cycle․
Proper preparation ensures a smooth and efficient self-cleaning experience․
Step-by-Step Guide to Activating Self-Cleaning Mode
Press the “Self-Clean” button, select desired time, and confirm․ Ensure the oven is empty, doors are locked, and ventilation is proper before starting the cycle․
3․1 Preparing the Oven for the Self-Clean Cycle
Before activating the self-clean cycle, ensure the oven is properly prepared․ Remove all racks, shelves, and utensils, as these may damage during high heat․ Wipe up large food spills to prevent excessive smoke․ Cover the floor with old sheets or towels to catch debris․ Allow the oven to cool completely to avoid burns․ Lock the oven door securely, as the cycle cannot start otherwise․ Ensure proper ventilation by opening windows․ Do not leave any cleaning aids or foil inside, as they may melt or cause damage․ Clean drip pans and exterior surfaces beforehand for a polished appearance․
3․2 Activating the Self-Clean Cycle
To activate the self-cleaning cycle on your GE stove, start by ensuring all racks and shelves are removed, as they may warp under high heat․ Locate the “Clean” button on the control panel and press it until the display shows the self-clean option․ Choose the desired cleaning time using the arrow keys—typically 2 to 4 hours, depending on grime severity․ Press “Start” to begin the cycle․ The oven will automatically lock once activated․ Do not open the door during cleaning, as it reaches extreme temperatures․ Ensure proper ventilation by opening windows or using an exhaust fan to manage fumes․ Let the oven cool completely before wiping down surfaces and replacing racks and shelves․
3․3 Post-Cycle Procedures
Once the self-cleaning cycle completes, allow the oven to cool completely before proceeding․ Do not open the door during the cooling phase, as it may still be extremely hot․ After cooling, wear oven mitts or gloves to protect your hands from residual heat․ Use a damp cloth or sponge to wipe down the interior, removing any ash or residue․ Avoid using abrasive cleaners, as they may damage the finish․ Replace the oven racks and drip pans, ensuring they are clean and properly positioned․ Finally, inspect the oven to ensure all residue has been removed for optimal performance and safety in future use․

Understanding the Self-Cleaning Process
The self-cleaning process uses high heat to burn food residue, converting it into ash․ This automated feature efficiently removes grime without harsh chemicals, saving time and effort while being eco-friendly․
4․1 How Self-Cleaning Ovens Work
Self-cleaning ovens use high heat, typically between 800°F and 1000°F, to burn food residue into ash․ The oven locks during this cycle to ensure safety․ The intense heat breaks down grime, making it easy to wipe away after cooling․ This process eliminates the need for harsh chemicals, providing an efficient and eco-friendly cleaning solution․ The oven’s interior is designed to withstand extreme temperatures, and the cycle is programmable, allowing users to set and forget․ Proper ventilation is essential to prevent fumes from spreading․ Always follow the GE stove manual for specific instructions to ensure optimal performance and safety․
4․2 The Role of High Heat in Self-Cleaning
High heat is the core mechanism of self-cleaning ovens․ During the cycle, the oven reaches extreme temperatures (800°F–1000°F), incinerating food residue into ash․ This intense heat ensures grease and grime are completely burned away, eliminating the need for scrubbing․ The oven locks during this process for safety․ Proper ventilation is crucial to prevent fumes from spreading․ The high heat cycle is efficient, saving time and effort, and the oven’s interior is designed to withstand these temperatures․ Always follow the GE stove manual for specific guidance on using this feature safely and effectively․
4․3 Importance of Ventilation During Cleaning
Proper ventilation is essential during the self-cleaning cycle to remove fumes and odors․ Open windows and turn on exhaust fans to circulate air and prevent smoke buildup․ GE stove manuals emphasize ventilation to avoid discomfort and potential health issues․ Inadequate airflow can lead to lingering smells and residue․ Ensuring good ventilation improves cleaning efficiency and safety․ Always follow the manual’s guidelines for optimal results and a safe cleaning experience․

Common Mistakes to Avoid
Avoid leaving racks or utensils inside, as high heat may damage them․ Never use abrasive cleaners post-cleaning, as they can harm the oven’s finish․ Follow manual instructions carefully to ensure safety and effectiveness․
5․1 Not Removing All Items from the Oven
One common mistake is failing to remove all racks, pans, and utensils before activating the self-clean cycle․ These items can warp or discolor due to extreme heat․ Additionally, food residue on utensils may burn, creating unpleasant odors and fumes․ Always check the oven cavity thoroughly and take out everything except racks specifically designed for high-heat cleaning․ This ensures a safer and more effective cleaning process․ Remember to consult your GE stove manual for specific guidelines on what can remain inside during the cycle․ Proper preparation prevents damage and maintains your oven’s performance over time․
5․2 Using Abrasive Cleaners After Self-Cleaning
Using abrasive cleaners after the self-cleaning cycle can damage the oven’s interior․ The high-heat process leaves behind a fine ash that can be easily wiped away with a damp cloth․ Abrasive cleaners or scourers can scratch the enamel or damage the finish․ GE recommends avoiding harsh chemicals and relying on the self-clean cycle for effective results․ If additional cleaning is needed, use a soft sponge and mild soap․ Never use steel wool or bleach, as these can harm the oven’s surface․ Always refer to your GE stove manual for approved cleaning methods to maintain your oven’s condition and warranty․

Post-Cleaning Maintenance
After the self-cleaning cycle, allow the oven to cool completely before wiping surfaces with a damp cloth․ This ensures safe and effective maintenance․
6․1 Allowing the Oven to Cool Down
Allowing the oven to cool down completely after the self-cleaning cycle is crucial for safety and maintenance․ Turn off the oven and let it cool naturally to avoid damage․ Opening the oven door slightly can help speed up the cooling process, but avoid using fans to accelerate it, as this may spread fumes․ Never clean the oven while it’s hot, as this can cause burns or damage to surfaces․ Proper cooling ensures the self-cleaning residue solidifies, making it easier to wipe away later․ This step also prevents any remaining fumes from causing discomfort or hazards in the kitchen․
6․2 Wiping Down the Oven Surfaces
After the oven has cooled completely, use a damp cloth or sponge to wipe down the surfaces․ This step removes food residue and ash left behind by the self-cleaning cycle․ For tougher spots, a soft brush or scouring pad can be used gently to avoid scratching the finish․ Avoid using abrasive cleaners or harsh chemicals, as they may damage the oven’s interior․ For racks and shelves, soak them in warm soapy water before scrubbing․ Once clean, dry all surfaces thoroughly to prevent streaks and water spots, ensuring your oven is ready for its next use․
Troubleshooting Common Issues
Troubleshoot common issues like error codes or unexpected noises․ Check power supply, ensure the oven door is closed properly, and clean sensors․ Refer to the manual for specific solutions․
Reset the oven if necessary and ensure proper ventilation to avoid fume buildup during cycles․ Addressing issues promptly prevents further complications․
7․1 Self-Clean Mode Not Activating
If the self-clean mode isn’t activating, check if the oven door is fully closed and latched․ Ensure the child safety lock isn’t engaged, as this can disable controls․ Verify the power supply and check for error codes on the display․ Clean the oven sensors and ensure proper ventilation․ If issues persist, reset the oven by unplugging it for 30 minutes․ Consult the GE stove manual for model-specific instructions or contact customer support if the problem continues․ Always follow safety guidelines to avoid damage or malfunction during troubleshooting․
Regular maintenance can prevent such issues․
7․2 Excessive Smoke During Cleaning
Excessive smoke during the self-cleaning cycle often results from large amounts of food debris burning off․ To minimize this, ensure the oven is clean of excess food before starting․ Open windows and turn on the exhaust fan to improve ventilation․ If smoke persists, stop the cycle and let the oven cool slightly before restarting․ Avoid using abrasive cleaners, as they can leave residue that burns and creates smoke․ Always follow the GE stove manual’s guidelines for optimal performance and safety․ Proper preparation and ventilation are key to reducing smoke during the self-cleaning process․
Regular light cleaning can help prevent this issue․

Model-Specific Instructions
GE provides tailored guidelines for different stove models․ Always refer to your specific model’s manual for precise self-cleaning instructions․ Visit GE’s website for model-specific resources and support․
Ensure proper operation by following the instructions designed for your appliance․
8․1 GE JB645DKWW Self-Cleaning Instructions
For the GE JB645DKWW model, start by ensuring the oven is empty and racks are removed․ Lock the oven door and set the self-clean mode via the control panel․ Choose the desired cleaning time or let the oven calculate it automatically․ The cycle uses high heat to burn food residue; After completion, let the oven cool before wiping down surfaces with a damp cloth․ Always refer to the JB645DKWW manual for specific settings and safety precautions․ Proper ventilation is crucial during the cycle to prevent smoke buildup․ Cleaning frequency depends on usage, but doing it every 1-3 months is recommended for optimal performance․
Regular maintenance ensures efficiency and longevity․
8․2 GE JGB660 Self-Cleaning Guidelines
For the GE JGB660 model, begin by removing all racks and ensuring the oven is empty․ Set the self-clean mode using the digital controls, selecting the desired cycle duration․ The oven door will automatically lock once the cycle starts․ The self-cleaning process uses intense heat to reduce food residue to ash․ After completion, allow the oven to cool before wiping surfaces with a damp cloth․ Avoid using abrasive cleaners․ The JGB660 model may have specific settings, so always consult the user manual for precise instructions․ Proper ventilation is essential during the cycle to minimize smoke․ Regular self-cleaning ensures optimal performance and longevity of the appliance․
Importance of the Owner’s Manual
The owner’s manual provides essential safety guidelines, troubleshooting tips, and specific instructions for optimal use of the GE stove’s self-cleaning feature, ensuring safe and effective operation․
9;1 Key Information in the Manual
The GE stove manual contains detailed instructions for the self-cleaning feature, including safety precautions, cycle duration, and preparation steps․ It outlines error codes, troubleshooting solutions, and maintenance tips to ensure optimal performance․ The manual also provides specific guidelines for different models, such as temperature settings and ventilation requirements․ Additionally, it covers warranty information and parts replacement details․ Reading the manual thoroughly helps users understand how to activate and manage the self-cleaning mode effectively, preventing damage and ensuring a safe cleaning process․ It serves as a comprehensive guide for first-time users and experienced owners alike․
9․2 Where to Find the Manual Online
To access the GE stove manual for self-cleaning, visit the official GE Appliances website․ Navigate to the “Support” section and use the “Search by Model Number” tool․ Enter your stove’s model number, which can be found on the appliance or in its packaging․ Once located, download the PDF manual for free․ If unavailable, check authorized retailers or contact GE customer support for assistance․ Ensure you have the correct model number for accurate results․ This resource provides detailed self-cleaning instructions tailored to your specific stove model․

Cleaning Exterior Parts
Clean exterior surfaces with a soft cloth and mild detergent․ Avoid abrasive cleaners or scrubbers to prevent damage․ Regular wiping prevents grease buildup and maintains appearance․ Dry thoroughly․
- Gently remove splatters and spills promptly․
- Use a microfiber cloth for polished finishes․
- Avoid harsh chemicals that may scratch surfaces․
- Dry surfaces to prevent water spots;
10․1 Cleaning the Drip Pans
Clean drip pans regularly to maintain your GE stove’s performance․ Remove pans and wash with warm soapy water․ Avoid abrasive cleaners or scourers to prevent scratching․ For tough stains, soak pans in hot water and mild detergent․ Dry thoroughly before reinstalling to prevent water spots․ Do not leave drip pans in the oven during self-cleaning mode, as high heat may damage them․ Replace any warped or heavily corroded pans to ensure proper function․ Regular maintenance keeps your stove looking new and functioning efficiently․
10․2 Maintaining the Stove’s Exterior
Keep your GE stove’s exterior in pristine condition by cleaning it regularly․ Use a soft, damp cloth to wipe down surfaces, avoiding harsh chemicals or abrasive materials that may damage finishes․ For tougher stains, apply a gentle stove cleaner or a mixture of equal parts water and white vinegar․ Avoid spraying cleaning products directly onto electrical components or knobs․ Dry surfaces thoroughly with a clean towel to prevent streaks or water spots․ Regular maintenance prevents grime buildup and ensures the stove retains its sleek appearance․ For glass surfaces, use a glass cleaner and a lint-free cloth for a streak-free finish․
Environmental and Health Considerations
Self-cleaning ovens release fumes during high heat cycles․ Ensure proper ventilation to prevent indoor air pollution․ Dispose of food residue safely and avoid toxic cleaners for eco-friendly maintenance․
11․1 Understanding Fumes Released During Cleaning
During the self-cleaning cycle, high temperatures cause food residue to burn, releasing fumes․ These fumes primarily consist of smoke from burnt food and potential volatile organic compounds․ Proper ventilation is essential to prevent indoor air pollution․ Open windows or use an exhaust fan to minimize fume accumulation․ Avoid inhaling these fumes, as they may irritate respiratory systems․ Ensure pets and sensitive individuals leave the area․ The intensity of fumes depends on oven cleanliness and residue buildup․ Always follow safety guidelines to reduce health risks and ensure a safe cleaning process․
11․2 Proper Disposal of Cleaning Residue
After the self-cleaning cycle, allow the oven to cool completely before handling any residue․ Use a soft brush or cloth to collect the ash and food particles․ Dispose of the residue in a sealed container or wrap it in paper to prevent spreading․ Avoid pouring ash down drains, as it may cause clogs․ For eco-friendly disposal, check local regulations for hazardous waste guidelines․ Always wear gloves and protective eyewear when handling residue to avoid skin irritation․ Proper disposal ensures safety and prevents environmental harm․ Clean drip pans separately with mild soap and water, then rinse thoroughly before replacing them․

Time Management Tips
Schedule self-cleaning cycles during low-usage times to avoid interrupting meal preparation․ Plan for downtime post-cleaning, as the oven needs time to cool before reuse․
12․1 Scheduling Self-Cleaning Cycles
Scheduling self-cleaning cycles is essential for maintaining your GE stove’s efficiency․ Plan the cycle during periods of low oven usage, such as weekends or days off, to avoid interrupting meal preparation․ Always check the owner’s manual for the recommended duration of the self-clean cycle, as this varies by model․ Regular scheduling helps prevent grime buildup and ensures the oven remains in optimal condition․ Avoid scheduling a cycle right before a major cooking event, as the oven will be unusable during and after cleaning․ Consistency in scheduling also helps maintain the stove’s performance and longevity․
12․2 Planning for Post-Cleaning Downtime
After activating the self-cleaning cycle, plan for downtime as the oven will be unusable during cooling․ Allow at least 2-3 hours for the oven to cool down completely before wiping it clean․ Schedule self-cleaning cycles when you won’t need the oven for several hours, such as after dinner․ This ensures safety and prevents meal preparation delays․ Proper planning also helps avoid last-minute cleanup tasks․ Always wait until the oven is cool to the touch before cleaning residue․ This downtime is crucial for safety and effective cleaning results․ Plan accordingly to make the most of your GE stove’s self-cleaning feature․

Frequently Asked Questions
How long does the self-clean cycle take? Typically, 2-3 hours․
Can I stop the cycle early? Not recommended; let it complete for best results․
13․1 How Long Does the Self-Clean Cycle Take?
The self-clean cycle on a GE stove typically lasts between 2 to 3 hours․ During this time, the oven heats to a high temperature to burn off food residue․
It’s important to let the cycle complete uninterrupted for optimal cleaning results․ After the cycle ends, allow the oven to cool before wiping it clean․ Always refer to your specific model’s manual for exact timings, as durations may vary slightly depending on the stove model and settings․ Proper completion ensures a safe and effective cleaning process․
13․2 Can I Leave the House While the Oven is Self-Cleaning?
It is generally not recommended to leave the house while the oven is in self-cleaning mode․ The high heat can produce fumes and smoke, which may require monitoring․ However, if your oven is in good working condition, has proper ventilation, and you have a functioning exhaust fan, it may be safe to leave briefly․ Always ensure the oven is clean of large food debris before starting the cycle․ For safety, it’s best to stay home and monitor the process․ Refer to your owner’s manual for specific guidelines․
The GE stove self-cleaning feature offers an efficient and convenient way to maintain your oven․ Always follow the manual for optimal results and safety․ Proper maintenance ensures long-lasting performance․
14․1 Recap of Key Points
The GE stove self-cleaning feature simplifies oven maintenance by using high heat to burn food residue․ Always follow safety guidelines, such as clearing the oven of racks and utensils before starting․ Proper preparation ensures a smooth cleaning process․ Avoid using abrasive cleaners post-cycle, as the oven surfaces may be sensitive․ Ventilation is crucial to prevent fumes from building up․ Regular self-cleaning extends the oven’s lifespan and maintains its efficiency․ Refer to the owner’s manual for model-specific instructions to optimize results and avoid potential issues․ Consistent maintenance ensures your GE stove remains in excellent condition for years to come․
14․2 Final Tips for Effective Self-Cleaning
For optimal results, schedule self-cleaning cycles when you’ll be home to monitor the process․ Always use the oven lock to ensure safety, especially if pets or children are present․ After cooling, wipe down surfaces with a damp cloth to remove ash․ Avoid harsh chemicals, as they can damage the finish․ Regular self-cleaning prevents grime buildup and maintains oven efficiency․ Follow the owner’s manual for specific timing and temperature settings․ Proper ventilation is key to reducing fumes․ By adhering to these tips, you’ll keep your GE stove in excellent condition and ensure a hassle-free cleaning experience every time․