pdf to kmz

Converting PDF documents containing geospatial data to the KMZ format unlocks powerful mapping capabilities. MyGeodata offers a streamlined online solution for this transformation‚ enabling easy data visualization.

What is a PDF and its Limitations for Geospatial Data?

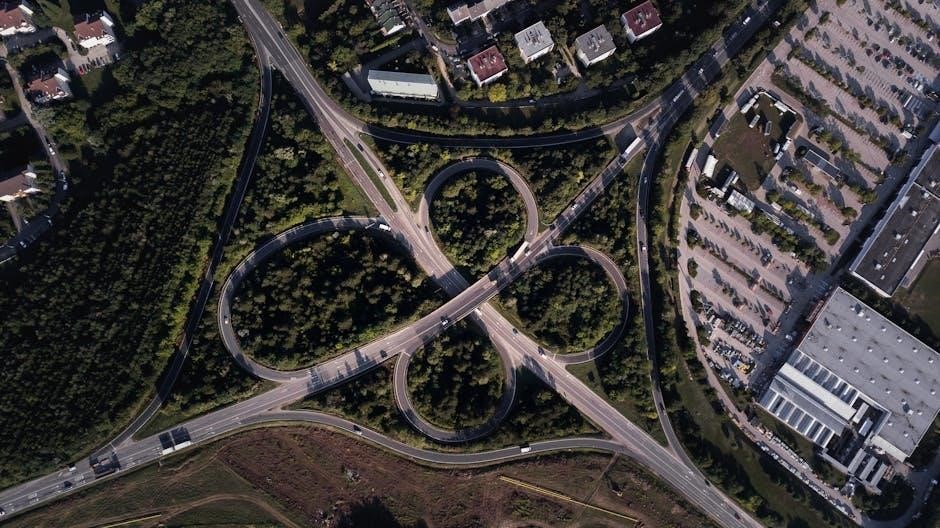
PDF (Portable Document Format) is a widely used file format designed for document presentation‚ prioritizing visual fidelity over data accessibility. While excellent for reports and images‚ PDFs inherently lack the geospatial intelligence needed for mapping applications. They typically store data as a raster image or uneditable text‚ meaning coordinate information is not readily available for GIS software.

This presents challenges when dealing with maps or diagrams within PDFs. Unlike formats like Shapefiles or GeoJSON‚ PDFs don’t natively support georeferencing or attribute data linked to spatial features. Extracting usable geospatial information requires conversion processes‚ often involving vectorization‚ to transform the PDF’s representation into a GIS-compatible format like KMZ.

What is a KMZ and Why Convert to This Format?

KMZ (Keyhole Markup Language Zipped) is a file format used to visualize geographic data in applications like Google Earth and Google Maps. It’s essentially a compressed package containing KML (Keyhole Markup Language) files‚ images‚ and 3D models‚ enabling rich geospatial displays.

Converting PDFs to KMZ allows for the integration of map data contained within those documents into interactive mapping environments. This unlocks capabilities like measuring distances‚ exploring terrain‚ and overlaying additional GIS layers. MyGeodata simplifies this process‚ making geospatial data from PDFs accessible and shareable‚ enhancing visualization and analysis possibilities.

Understanding the Conversion Process

PDF to KMZ conversion involves extracting geospatial information and transforming it into a compatible format. MyGeodata facilitates this‚ handling coordinate systems and data structures effectively.

The Core Challenge: Vectorizing PDF Data

A primary hurdle in PDF to KMZ conversion lies in vectorizing the data. PDFs often store map information as images (raster data)‚ while KMZ relies on vector data – points‚ lines‚ and polygons. MyGeodata addresses this by employing algorithms to identify and recreate these geospatial features.

This process isn’t always perfect; complex PDFs can lead to inaccuracies. The conversion requires intelligent interpretation of the PDF’s structure to accurately define vector elements. Successful vectorization is crucial for maintaining map precision and enabling GIS functionalities within the KMZ file‚ allowing for analysis and manipulation of the geospatial information.

Raster vs. Vector Data and its Impact on Conversion

Understanding the difference between raster and vector data is key to successful PDF to KMZ conversion. Raster images‚ like those often found in PDFs‚ are pixel-based‚ losing detail when zoomed. MyGeodata converters tackle this by attempting to define vector shapes from raster images.

Vector data‚ conversely‚ uses mathematical equations to represent shapes‚ remaining sharp at any scale. Converting from raster to vector inevitably involves some interpretation and potential loss of fidelity. The quality of the original PDF and the sophistication of the conversion tool significantly impact the final KMZ’s accuracy and usability.

Coordinate Systems and Georeferencing in PDF to KMZ

Accurate geospatial data relies on correctly defined coordinate systems. PDFs often lack inherent geographic referencing‚ requiring “georeferencing” – assigning real-world coordinates. MyGeodata converters allow specifying the target coordinate system during conversion‚ ensuring the KMZ file aligns correctly with other geospatial datasets.

Without proper georeferencing‚ the KMZ will display in the wrong location. Understanding the original PDF’s intended coordinate system (if known) is crucial. Incorrect settings lead to positional errors‚ rendering the converted data useless for accurate analysis or mapping.

Methods for Converting PDF to KMZ

Various approaches exist‚ from user-friendly online tools like MyGeodata Converter to robust desktop software and specialized GIS applications for PDF to KMZ conversion.

Online Conversion Tools (e.g.‚ MyGeodata Converter)

Online converters‚ such as MyGeodata Converter‚ provide a convenient and accessible method for transforming PDF files into the KMZ format without requiring software installation. These tools typically employ a simple drag-and-drop interface‚ allowing users to upload their PDF documents and initiate the conversion process with just a few clicks.

MyGeodata specifically supports the conversion of GIS and CAD data‚ offering transformation to various formats including KMZ‚ alongside options for coordinate system adjustments. This accessibility makes them ideal for quick conversions and users without extensive GIS expertise. However‚ it’s crucial to consider file size limitations and potential privacy concerns when utilizing these platforms.

Desktop Software Options for PDF to KMZ Conversion

Desktop software offers robust capabilities for converting PDFs to KMZ‚ providing greater control and often handling larger‚ more complex files than online tools. Adobe Acrobat Pro allows conversion to GIS formats as an intermediate step‚ while specialized geospatial software like Global Mapper directly supports KMZ export.

Global Mapper is particularly powerful‚ offering extensive geospatial processing tools. Manifold System presents another advanced option‚ boasting sophisticated PDF to KMZ conversion features. These applications generally require a one-time purchase or subscription but deliver enhanced accuracy and functionality for professional use cases.

Using GIS Software (QGIS‚ ArcGIS) for Conversion

GIS software like QGIS and ArcGIS provide powerful‚ albeit more complex‚ methods for PDF to KMZ conversion. The process typically involves importing the PDF as raster data‚ requiring georeferencing to establish spatial coordinates. Once georeferenced‚ the raster can be vectorized – converting images into editable geographic features.

QGIS‚ being open-source‚ is a popular choice. ArcGIS offers similar functionality‚ though it’s a commercial product. Finally‚ the vectorized data is then exported in KMZ format‚ enabling its use in Google Earth and other compatible applications. This approach offers high precision and control.

Detailed Look at Online Converters

Online converters‚ such as MyGeodata‚ simplify PDF to KMZ conversion with user-friendly interfaces. They offer quick transformations of GIS data without software installation.

MyGeodata Converter: Features and Functionality

MyGeodata Converter stands out as a dedicated online tool specifically designed for PDF to KMZ transformations‚ alongside support for numerous other GIS and CAD formats. Its core functionality centers around a simple drag-and-drop interface‚ allowing users to upload PDF files effortlessly.

The converter excels in its ability to handle coordinate system transformations‚ ensuring accurate georeferencing of the resulting KMZ file. Users can specify the desired coordinate system‚ vital for correct spatial positioning. Beyond KMZ‚ MyGeodata supports conversions to SHP‚ KML‚ TAB‚ CSV‚ GeoJSON‚ GML‚ DGN‚ and DXF‚ offering versatile data handling. It’s a robust solution for quick and accessible geospatial data conversion.

Advantages of Using Online Converters

Online converters‚ like MyGeodata‚ offer significant advantages for PDF to KMZ conversion. Accessibility is key – no software installation is required‚ enabling conversion from any device with an internet connection. This eliminates compatibility issues and simplifies the process for users.

They are generally cost-effective‚ often providing free conversion options for smaller files. Speed is another benefit; conversions are typically fast‚ especially compared to complex desktop software workflows. Furthermore‚ online tools often feature user-friendly interfaces‚ making them ideal for those without extensive GIS expertise. They provide a quick and convenient solution for basic conversion needs.

Limitations of Online Converters (File Size‚ Privacy)

Despite their convenience‚ online PDF to KMZ converters have limitations. File size restrictions are common; larger PDFs may exceed upload limits‚ necessitating desktop software. MyGeodata‚ while efficient‚ may have such constraints. Privacy concerns also arise as files are uploaded to a third-party server.

Sensitive geospatial data requires careful consideration before using online tools. Conversion accuracy can sometimes be lower compared to dedicated GIS software‚ particularly with complex PDFs. Dependence on internet connectivity is another drawback‚ and the absence of advanced customization options may limit control over the final KMZ output.

Desktop Software Conversion Techniques

Dedicated desktop software‚ like Adobe Acrobat Pro and Global Mapper‚ provides robust PDF to KMZ conversion capabilities‚ offering greater control and precision than online tools.

Adobe Acrobat Pro: Converting PDFs to GIS Formats

Adobe Acrobat Pro‚ while not directly exporting to KMZ‚ facilitates conversion to intermediate GIS formats like Shapefile (SHP) or GeoTIFF. This indirect approach involves utilizing Acrobat’s export features to create a geospatial file‚ subsequently imported into GIS software for KMZ generation.

The process typically begins by exporting the PDF as a CAD drawing (DXF or DWG). These formats retain vector information crucial for accurate geospatial representation. Following export‚ GIS software such as QGIS or ArcGIS can import the CAD file‚ georeference it if necessary‚ and finally export it as a KMZ file.

This method offers flexibility and control‚ particularly when dealing with complex PDF layouts or requiring precise georeferencing before KMZ creation.

Global Mapper: A Powerful Tool for Geospatial Conversion

Global Mapper stands out as a robust desktop GIS software adept at handling PDF to KMZ conversions. It directly imports PDF files‚ automatically recognizing and extracting vector data‚ and supports a wide array of coordinate systems.

Unlike some tools‚ Global Mapper excels at processing scanned PDFs‚ employing optical character recognition (OCR) to convert raster images into editable vector formats. This feature is invaluable for older or image-based maps.

The software allows for precise georeferencing‚ ensuring accurate spatial positioning in the resulting KMZ file. Users can then easily export the data to KMZ‚ controlling compression and other output parameters.

Manifold System: Advanced PDF to KMZ Capabilities

Manifold System offers sophisticated PDF to KMZ conversion features‚ particularly suited for complex geospatial datasets. It imports PDFs as vector data‚ preserving layers and attributes with high fidelity. The software’s powerful engine handles large and intricate PDF files efficiently.

A key strength lies in its advanced georeferencing tools‚ allowing precise alignment of PDFs to real-world coordinates. Manifold supports numerous coordinate systems and transformations‚ ensuring accurate spatial representation in the KMZ output.

Users benefit from extensive control over the conversion process‚ including options for simplifying geometries and optimizing file size for web viewing.

GIS Software Approaches (QGIS)

QGIS provides a flexible‚ open-source pathway for PDF to KMZ conversion‚ utilizing raster import‚ georeferencing‚ and subsequent vectorization for geospatial data handling.

Importing PDF as Raster Data in QGIS

QGIS doesn’t directly understand vector information within a PDF; therefore‚ the initial step involves importing the PDF as a raster image. This is achieved through the “Add Raster Layer” function‚ selecting the PDF file.

The PDF pages are then rendered as individual raster layers within QGIS. It’s crucial to understand that this process treats the PDF content as an image‚ losing the inherent vector structure. Consequently‚ features are represented as pixels rather than editable shapes.

Resolution settings during import significantly impact the final quality and file size; higher resolutions preserve detail but increase processing demands. This rasterization is a necessary precursor to georeferencing and eventual vectorization.

Georeferencing the PDF in QGIS

Once the PDF is imported as a raster‚ georeferencing is essential to assign real-world coordinates. This process aligns the raster image with a known coordinate system. Within QGIS‚ utilize the “Georeferencer” plugin to define Ground Control Points (GCPs).

GCPs are identifiable locations on the PDF that correspond to known coordinates. Inputting at least three GCPs allows QGIS to establish a transformation‚ warping the raster to fit the correct geographic location. Accuracy relies heavily on precise GCP selection.

After transformation‚ a new world file (.wld) is created‚ linking the raster to its spatial reference‚ enabling accurate measurements and integration with other geospatial data.

Vectorizing and Exporting to KMZ in QGIS

Following georeferencing‚ vectorization converts the raster PDF data into vector formats like polygons and lines. QGIS offers tools like “Raster to Vector” for this purpose‚ allowing customization of simplification thresholds. Careful adjustment is crucial to balance detail and file size.

Once vectorized‚ the data can be styled and symbolized within QGIS. Finally‚ export the vector layers as a KMZ file using “Layer > Save As…”‚ selecting KMZ as the format. This creates a compressed archive containing the geospatial data ready for use in Google Earth.

Troubleshooting Common Conversion Issues

Addressing inaccuracies‚ coordinate system errors‚ and large file sizes are common challenges; Optimization techniques and careful review of settings are essential for successful PDF to KMZ conversion.

Loss of Data Accuracy During Conversion

Data accuracy loss is a frequent concern when converting PDFs to KMZ‚ particularly with complex geospatial documents; PDFs often store data as vectors or raster images‚ and the conversion process can introduce errors. Rasterization‚ converting vector data to pixels‚ inherently reduces precision.

Vectorizing raster data back to vectors isn’t always perfect‚ leading to simplified geometries or misinterpretations of original features. MyGeodata and other converters attempt to minimize this‚ but the initial PDF quality significantly impacts the outcome. Ensuring high-resolution PDFs and carefully reviewing the converted KMZ for discrepancies are crucial steps. Georeferencing errors in the original PDF will also propagate‚ affecting accuracy.

Incorrect Coordinate Systems in the KMZ File

Coordinate system mismatches are a common issue in PDF to KMZ conversions‚ leading to inaccurate geographic positioning. PDFs don’t always explicitly define their coordinate system‚ requiring converters to make assumptions. If these assumptions are incorrect‚ the resulting KMZ file will display data in the wrong location.

MyGeodata and similar tools allow users to specify the input PDF’s coordinate system‚ mitigating this risk. However‚ correctly identifying the original system is vital. GIS software like QGIS can help determine the PDF’s projection before conversion. Always verify the KMZ’s coordinate system after conversion to ensure proper alignment with other geospatial datasets.

Large KMZ File Sizes and Optimization Techniques

KMZ files generated from PDF conversions can become excessively large‚ especially with detailed vector data. This impacts loading times and usability within Google Earth or other KMZ viewers. Simplification of vector geometries during conversion is a key optimization technique. Reducing the number of vertices and removing unnecessary details significantly shrinks file size.

Rasterization‚ converting vector data to images‚ can also reduce size‚ though at the cost of precision. MyGeodata and GIS software often offer options for controlling these parameters. Compressing images within the KMZ file further minimizes storage requirements‚ balancing file size and visual quality.

Advanced Considerations

Automating PDF to KMZ conversion via scripting enhances efficiency for large datasets. Maintaining data integrity and batch processing are crucial for complex geospatial workflows.

Batch Conversion of Multiple PDF Files

Handling numerous PDF files requiring KMZ conversion can be significantly streamlined through batch processing techniques. Instead of individually uploading and converting each document‚ specialized tools and scripting options allow for simultaneous transformation. This is particularly useful for large-scale projects involving extensive geospatial datasets.

MyGeodata‚ while primarily known for its single-file conversion‚ often integrates with scripting languages or offers API access‚ enabling automated batch workflows. Desktop GIS software like QGIS and ArcGIS also provide robust batch processing capabilities. Careful consideration must be given to file organization and naming conventions to maintain clarity after conversion. Efficient batch conversion saves considerable time and resources.

Automating the Conversion Process with Scripts

Automating PDF to KMZ conversion using scripts elevates efficiency‚ especially for repetitive tasks or large datasets. Python‚ with libraries like os for file management and potentially interacting with online converters via API calls (like MyGeodata’s if available)‚ is a popular choice. Scripts can loop through directories‚ automatically convert each PDF‚ and organize the resulting KMZ files.

GIS software like QGIS also supports scripting (PyQGIS)‚ allowing for customized conversion workflows. This approach offers greater control over georeferencing and vectorization parameters. Scripting minimizes manual intervention‚ reduces errors‚ and enables seamless integration into broader geospatial data processing pipelines.

Maintaining Data Integrity During Conversion

Preserving data accuracy during PDF to KMZ conversion is paramount. Vectorization‚ a core step‚ can introduce errors if not carefully managed. Utilizing tools like MyGeodata‚ which focus on GIS/CAD data transformation‚ can help minimize these issues. Thoroughly verifying the KMZ output against the original PDF is crucial.

Coordinate system accuracy must be maintained throughout the process. Incorrect georeferencing leads to spatial inaccuracies. Employing robust GIS software and carefully defining coordinate systems are essential. Regular quality control checks ensure the converted KMZ file faithfully represents the original geospatial information.

Future Trends in PDF to KMZ Conversion

AI-powered tools promise enhanced accuracy and efficiency in PDF to KMZ conversion‚ alongside seamless integration with cloud-based GIS platforms for improved workflows.

AI-Powered Conversion Tools

The future of PDF to KMZ conversion is rapidly evolving with the integration of Artificial Intelligence (AI). These innovative tools move beyond traditional methods‚ offering significantly improved accuracy in vectorizing complex PDF data. AI algorithms can intelligently identify and interpret geospatial elements within PDFs‚ minimizing errors and data loss during the conversion process.

Furthermore‚ AI can automate georeferencing‚ a traditionally manual and time-consuming task. Machine learning models are being trained to recognize coordinate systems and accurately align the converted KMZ data. This leads to faster turnaround times and reduced manual intervention. Expect to see more sophisticated AI-driven converters capable of handling diverse PDF formats and complex geospatial content‚ ultimately revolutionizing the field.

Improved Accuracy and Efficiency

Recent advancements are dramatically enhancing the accuracy of PDF to KMZ conversions. Traditional methods often struggle with complex layouts and imperfect scans‚ leading to data distortion. New algorithms‚ coupled with enhanced optical character recognition (OCR)‚ are minimizing these issues‚ ensuring faithful representation of geospatial information.

Efficiency gains are equally significant. Automated processes reduce manual intervention‚ drastically shortening conversion times. Online tools like MyGeodata exemplify this‚ offering quick‚ one-click solutions. These improvements empower users to rapidly integrate PDF-based maps and data into GIS environments‚ streamlining workflows and accelerating geospatial analysis.

Integration with Cloud-Based GIS Platforms

Seamless integration of KMZ files‚ generated from PDF conversions‚ with cloud-based GIS platforms is becoming increasingly vital. This connectivity allows for collaborative mapping‚ real-time data sharing‚ and accessibility from any location. Platforms benefit from the standardized KMZ format‚ facilitating easy import and visualization of previously static PDF data.

Tools like MyGeodata support this trend by providing direct export options compatible with popular cloud GIS solutions. This eliminates the need for intermediate format conversions‚ reducing potential errors and saving valuable time. Cloud integration unlocks powerful analytical capabilities and broader data dissemination.

proform elliptical user manual

ProForm Elliptical User Manual: A Comprehensive Guide

Welcome! This manual details the ProForm elliptical trainer, model 831.23935.0, offering effective home workouts. Dimensions are 5’8” length and 2’2” width.

Congratulations on choosing a ProForm elliptical trainer! This machine is designed to provide a comprehensive and effective cardiovascular workout in the comfort of your home. The ProForm elliptical offers an impressive selection of features intended to enhance your fitness journey and help you achieve your health goals.

Before you begin, please take the time to carefully read this user manual. It contains important information regarding the safe operation, assembly, maintenance, and troubleshooting of your new elliptical. Understanding these guidelines will ensure a safe and enjoyable workout experience. This manual specifically addresses model 831.23935.0, and provides details on its various components and functionalities.

We are confident that your ProForm elliptical will become a valuable asset in your pursuit of a healthier lifestyle. Let’s get started!

Unboxing and Assembly

Carefully unpack all components from the shipping carton. Verify that all parts listed in the ‘Parts List and Identification’ section are present. It’s recommended to assemble the elliptical on a protective surface, like a large piece of cardboard, to prevent scratching the floor or damaging the machine.

Begin by attaching the base components, following the step-by-step instructions included with your model. Use the provided hardware, referencing the drawings to correctly identify each part – the numbers in parentheses correspond to the part list. Ensure all bolts are securely tightened, but avoid over-tightening.

Next, assemble the upright and console components. Finally, attach the pedals and any remaining accessories. Double-check all connections for stability before using the elliptical. If you encounter any difficulties, refer to the detailed diagrams or contact customer support.

Parts List and Identification

Locate the comprehensive parts list included within your ProForm elliptical packaging. This list details every component necessary for assembly and future maintenance. Each part is assigned a unique key number, crucial for referencing during the assembly process and when ordering replacement parts.

Carefully compare the physical parts with the illustrations and descriptions provided in the list. Pay close attention to the shape, size, and any specific markings on each component. The manual utilizes drawings to visually identify smaller parts, making assembly easier.

Familiarize yourself with the names and functions of key components like the base frame, upright assembly, console, pedals, and resistance mechanism. Knowing these parts will aid in troubleshooting and performing routine maintenance. Keep this parts list in a safe place for future reference.

Safety Precautions and Warnings

Prioritize safety during assembly, operation, and maintenance of your ProForm elliptical. Always read all precautions and instructions thoroughly before use. Ensure the elliptical is placed on a level surface with at least eight feet of clearance around it.

Inspect all parts for damage before each workout. Do not use the elliptical if any parts are missing or damaged. Keep children and pets away from the machine during operation. Never operate the elliptical with wet hands or feet.

Always wear appropriate athletic shoes and clothing. Use caution when getting on or off the elliptical. If you feel pain or dizziness, immediately stop exercising. Consult your physician before starting any new exercise program.

Getting Started with Your Elliptical

Begin your fitness journey! Familiarize yourself with the console features, power-on procedures, and resistance adjustments for an optimal elliptical experience.

Console Overview and Features

The console is your command center! It displays essential workout data, including time, distance, speed, resistance level, and calories burned. Explore the intuitive interface for easy navigation through pre-programmed workouts and custom settings.

Key features include clearly visible display metrics, heart rate monitoring compatibility (if equipped), and user profile selection. The console allows for seamless adjustment of resistance levels, enabling you to tailor the intensity of your workouts.

Furthermore, the console may offer connectivity options like Bluetooth, facilitating integration with fitness apps and iFit (sold separately). Utilize the console’s buttons to start, stop, and pause your workouts, as well as to access various program options. Understanding these features will maximize your elliptical training experience and help you achieve your fitness goals efficiently.

Powering On and Initial Setup

Let’s get started! Before your first workout, ensure the elliptical is fully assembled and properly positioned. Plug the power cord into a grounded outlet. The console will illuminate upon power-up, initiating a self-test sequence.

Follow the on-screen prompts to complete the initial setup. This typically involves entering your personal information, such as age, weight, and height, to personalize workout calculations. You may also be prompted to select your preferred units of measurement (miles or kilometers).

Familiarize yourself with the emergency stop button – a crucial safety feature. Confirm the console displays accurate information and responds to button presses. If prompted, calibrate the console according to the instructions. A successful initial setup ensures accurate data tracking and a smooth workout experience.

Adjusting Resistance Levels

Control your intensity! The ProForm elliptical allows you to easily adjust resistance levels for a customized workout. Resistance is typically controlled via buttons on the console, often marked with “+” and “-” symbols. Pressing “+” increases the resistance, making your workout more challenging, while “-” decreases it.

The console display will indicate the current resistance level, usually ranging from 1 to 20 or higher, depending on the model. Start with a lower resistance level and gradually increase it as your fitness improves. Experiment with different levels to find what suits your fitness goals.

Some models feature pre-programmed workouts that automatically adjust resistance throughout the session. Remember to adjust gradually and listen to your body to avoid overexertion.

Stride Length Adjustment

Personalize your motion! Optimizing stride length is crucial for comfort and effectiveness on your ProForm elliptical. Many models offer adjustable stride lengths, accommodating users of varying heights and preferences. Locate the adjustment mechanism, typically near the pedals or foot platforms.

This often involves a simple pin or lever system. Releasing the pin allows you to reposition the pedals, altering the length of your stride. A longer stride is generally preferred by taller users, while a shorter stride suits those with shorter legs. Experiment to find a natural, comfortable stride.

Ensure both pedals are adjusted to the same length for balanced motion. Proper stride length minimizes strain and maximizes workout efficiency. Consult your specific model’s diagrams for precise adjustment instructions.

Workout Programs and Customization

Explore fitness options! This section details pre-programmed workouts and how to create personalized routines, maximizing your ProForm elliptical’s potential for varied training.

Pre-programmed Workout Profiles

Diverse Training Options: Your ProForm elliptical boasts a selection of pre-programmed workout profiles designed to cater to various fitness levels and goals. These profiles automatically adjust resistance and incline, providing a dynamic and challenging workout experience without requiring manual intervention.

Workout Variety: Expect profiles focused on different areas, such as fat burning, cardio, hill climbs, and interval training. Each profile simulates a different workout scenario, keeping your routines engaging and preventing plateaus. The console display will clearly indicate the current profile, the remaining time, and the intensity level.

Easy Selection: Navigating these profiles is straightforward via the console. Simply browse the available options and select the one that best suits your desired workout. The elliptical will then guide you through the program, automatically adjusting the settings as needed. Experiment with different profiles to discover what works best for you and to continually challenge your body.

Creating Custom Workouts

Personalized Fitness: Beyond pre-programmed options, your ProForm elliptical empowers you to design custom workouts tailored to your specific fitness aspirations. This feature allows for complete control over workout intensity, duration, and resistance levels, maximizing your training effectiveness.

Manual Control: Utilize the console to manually adjust resistance and incline throughout your workout. Increase the challenge during peak intervals and reduce it for recovery periods. You can also set specific time durations for each intensity level, creating a truly personalized routine.

Save Your Progress: Many ProForm models allow you to save your custom workouts for future use. This eliminates the need to recreate your preferred routines each time, streamlining your fitness journey. Explore the console’s menu options to discover how to save, load, and modify your custom profiles.

Heart Rate Monitoring

Track Your Intensity: Accurate heart rate monitoring is crucial for optimizing your workouts. Your ProForm elliptical offers several methods for tracking your pulse, enabling you to stay within your target heart rate zone for maximum calorie burn and cardiovascular improvement.

Grip Pulse Sensors: Conveniently located on the handlebars, the grip pulse sensors provide a quick and easy way to monitor your heart rate during exercise. Simply hold the sensors firmly to receive a reading on the console display. Ensure a consistent grip for accurate results.

Wireless Heart Rate Monitoring: For hands-free monitoring, your elliptical is compatible with select wireless heart rate chest straps (sold separately). This provides continuous and precise heart rate data without interrupting your workout flow. Consult your console’s manual for compatible strap models.

Using the Console Display

Navigating Your Data: The console display is your central hub for workout information. It presents real-time data such as time, distance, speed, incline, resistance level, and estimated calories burned. Familiarize yourself with the button layout to easily navigate between metrics.

Workout Profiles & Metrics: During a workout, the display clearly shows your progress within the selected program. Key performance indicators are prominently displayed, allowing you to monitor your intensity and adjust accordingly. The display also provides feedback on your heart rate, if a sensor is in use.

Customization Options: Many ProForm consoles allow you to customize the display settings, such as brightness and metric units. Explore the console menu to personalize your viewing experience. Refer to the console’s specific manual for detailed instructions on display customization.

Maintenance and Troubleshooting

Keep it Running Smoothly: Regular cleaning, lubrication, and belt tension checks are vital for optimal performance and longevity of your ProForm elliptical trainer.

Cleaning and Lubrication

Maintaining a Pristine Machine: To ensure the longevity and smooth operation of your ProForm elliptical, regular cleaning is essential. Wipe down the frame, console, and handrails with a damp cloth after each use to remove sweat and dust. Avoid abrasive cleaners, as they can damage the surfaces.

Lubrication is Key: Proper lubrication minimizes friction and wear on moving parts. Periodically lubricate the elliptical’s drive system, specifically where the drive link connects to the front crank arm. Use a silicone-based lubricant specifically designed for exercise equipment – do not use oil-based lubricants. Apply sparingly, following the manufacturer’s instructions. Over-lubrication can attract dust and grime.

Belt Care: Inspect the running belt regularly for wear and tear. Clean the belt with a soft, damp cloth. Avoid getting water on the console or other electronic components. Consistent cleaning and lubrication will contribute to a quieter, smoother, and more enjoyable workout experience.

Belt Tension Adjustment

Maintaining Optimal Performance: Correct belt tension is crucial for a smooth and effective elliptical workout. If the belt slips during use, or feels loose, it requires adjustment. Locate the rear adjustment knob, typically found at the back of the elliptical frame.

Adjusting the Tension: Turning the knob clockwise increases tension, while turning it counterclockwise decreases tension. Make small adjustments – a quarter turn at a time – and test the belt after each adjustment. The belt should feel firm but not overly tight. Avoid excessive tension, as this can strain the motor and other components.

Proper Feel: A properly tensioned belt will provide a stable and consistent feel underfoot. If you continue to experience slippage or excessive looseness after adjustments, consult a qualified technician. Regular checks and adjustments will ensure optimal performance and prevent premature wear.

Troubleshooting Common Issues

Addressing Typical Problems: Several issues can arise during elliptical use. If the console doesn’t power on, check the power cord and outlet. Ensure the cord is securely connected at both ends. For unusual noises, inspect for loose parts and tighten any bolts you find. A slipping belt often indicates insufficient tension – refer to the ‘Belt Tension Adjustment’ section.

Console Errors: If the console displays an error code, consult the ‘Error Codes and Solutions’ section for specific guidance. Intermittent operation might suggest a loose connection within the console itself. Always power off and unplug the elliptical before inspecting internal components.

Preventative Measures: Regular cleaning and lubrication, as outlined in the ‘Maintenance’ section, can prevent many common problems. If issues persist, contact ProForm customer support for assistance. Do not attempt repairs beyond your skill level.

Error Codes and Solutions

Decoding Console Messages: The ProForm elliptical console utilizes error codes to diagnose internal issues. While specific codes vary by model, common errors include “ERR 1” indicating a communication fault, often resolved by restarting the console. “ERR 2” may signal a motor overload; reduce resistance and try again.

Troubleshooting Steps: If an error persists, power off the elliptical for several minutes, then restart. Check all cable connections to the console. If the error continues, record the code and contact ProForm customer support, providing your elliptical’s serial number for efficient assistance.

Preventative Maintenance: Regular maintenance, including cleaning and lubrication, can minimize error occurrences. Avoid exceeding the maximum user weight capacity, as this can trigger motor-related errors. Always consult the full user manual for a comprehensive list of error codes and their solutions.

Advanced Features and Connectivity

Explore iFit! This elliptical offers Bluetooth connectivity and iFit compatibility for enhanced workouts and data tracking, personalizing your fitness journey.

iFit Compatibility and Setup

Unlock Interactive Fitness! Your ProForm elliptical is designed to seamlessly integrate with iFit, a leading interactive fitness platform. iFit provides access to a vast library of on-demand workouts, studio classes, and global workout destinations, all led by certified trainers.

Getting Started: To begin, download the iFit app on your smartphone or tablet. Create an account or log in if you already have one. Follow the in-app instructions to connect your elliptical via Bluetooth. The console will guide you through the pairing process.

Subscription Required: Please note that an iFit subscription is required to access the full range of features. You can choose from individual or family plans. Once connected, you can explore the iFit library directly on the elliptical’s console, enjoying personalized training experiences tailored to your fitness level and goals. Regular updates enhance the iFit experience.

Bluetooth Connectivity

Stay Connected and Track Your Progress! Your ProForm elliptical features Bluetooth connectivity, enabling seamless integration with various fitness apps and devices. This allows you to monitor your workout data, track your progress, and share your achievements with friends.

Pairing Devices: To connect your smartphone or tablet, navigate to the Bluetooth settings on your device and search for available devices. Select your ProForm elliptical from the list. You may be prompted to enter a pairing code, displayed on the console. Once paired, you can stream music, utilize fitness apps, and sync workout data.

Data Synchronization: Bluetooth connectivity facilitates automatic synchronization of workout metrics like time, distance, calories burned, and heart rate to compatible fitness platforms. Ensure Bluetooth is enabled on both your elliptical and your device for optimal performance. Consistent connectivity enhances your overall fitness tracking experience.

User Profiles and Data Tracking

Personalized Fitness Experience! The ProForm elliptical allows for the creation of multiple user profiles, catering to individual fitness goals and preferences. Each profile stores personalized data, including age, weight, and workout history, ensuring accurate calorie burn and distance calculations.

Tracking Your Progress: The console diligently tracks key workout metrics such as time, distance, speed, incline, resistance level, and calories burned. This data is stored within each user profile, providing a comprehensive overview of your fitness journey. Review past workouts to identify trends and monitor improvements.

Data Analysis & Motivation: Regularly reviewing your tracked data can be incredibly motivating. Identify peak performance times, areas for improvement, and celebrate milestones achieved. Utilizing user profiles and data tracking features maximizes the effectiveness of your ProForm elliptical workouts.

Elliptical Dimensions and Specifications

Understanding Your Machine’s Size: The ProForm elliptical trainer, specifically model 831.23935.0, is designed with space efficiency in mind while providing a robust workout platform. Its overall length measures 5 feet 8 inches (173 cm), and the width extends to 2 feet 2 inches (66 cm).

Weight Capacity & Stability: This elliptical boasts a sturdy construction capable of supporting a maximum user weight. While the exact weight capacity varies by model, it’s designed for stability during intense workouts; Always refer to the specific model’s documentation for precise weight limits.

Footprint Considerations: When planning your workout space, consider these dimensions to ensure adequate room for comfortable and safe operation. Proper spacing allows for a full range of motion and prevents accidental contact with surrounding objects.

suspension trainer exercises pdf

Suspension training offers a versatile workout‚ detailed in comprehensive guides like the “Complete Guide to TRX Suspension Training‚” featuring over 115 exercises for all fitness levels․

These systems‚ ideal for gym‚ home‚ or travel‚ enhance strength‚ power‚ core stability‚ flexibility‚ and balance‚ as demonstrated by advanced applications for athletes needing muscle restoration․

What is a Suspension Trainer?

A suspension trainer‚ like the popular TRX system‚ utilizes bodyweight and gravity to provide a challenging and adaptable workout․ It fundamentally consists of two adjustable straps with handles‚ anchored securely to a stable point․

Unlike traditional weightlifting‚ a suspension trainer requires constant core engagement to maintain stability throughout each exercise․ This unique characteristic makes it incredibly effective for building functional strength‚ improving balance‚ and enhancing overall fitness․ Detailed guides‚ such as the “Complete Guide to TRX Suspension Training‚” offer extensive instruction on proper setup and technique․

Its portability and versatility allow for effective workouts anywhere‚ making it a valuable tool for athletes and fitness enthusiasts alike‚ as highlighted in various resources detailing TRX exercises․

Benefits of Suspension Training

Suspension training delivers a multitude of benefits‚ extending beyond simple strength gains․ It significantly enhances core stability‚ as the body constantly works to control movement against gravity․ This leads to improved posture and reduced risk of injury․

Furthermore‚ it fosters functional strength – the kind of strength used in everyday activities – making movements more efficient and powerful․ The adaptable nature of the system‚ detailed in guides like the “Complete Guide to TRX Suspension Training‚” allows for scalable exercises suitable for all fitness levels․

Athletes benefit from targeted muscle restoration‚ particularly in the quadriceps and hamstrings‚ as noted in research on suspension systems‚ while its portability enables workouts anywhere․

Upper Body Exercises

Suspension trainers effectively target upper body muscles – chest‚ back‚ and shoulders – utilizing bodyweight for resistance‚ as outlined in various exercise guides․

Chest Exercises

Chest exercises with a suspension trainer provide a dynamic and scalable workout‚ utilizing bodyweight to challenge muscle strength and endurance․ The TRX Chest Press is a foundational movement‚ adjustable by altering body angle – the more upright‚ the easier the exercise․

TRX Flyes further isolate the pectoral muscles‚ demanding greater stability and control․ These exercises‚ detailed in comprehensive guides‚ engage supporting muscles for a full-body benefit․ Proper form is crucial; maintaining a plank position throughout prevents injury and maximizes effectiveness․ Variations exist to increase or decrease difficulty‚ catering to all fitness levels․ Integrating these exercises into a routine builds upper body strength and definition;

TRX Chest Press

The TRX Chest Press is a fundamental exercise‚ effectively targeting the pectoral muscles using bodyweight and suspension․ Begin by facing away from the anchor point‚ holding the handles with palms facing each other․ Lean forward‚ maintaining a plank position with a straight line from head to heels․

Lower your chest towards your hands by bending your elbows‚ then press back to the starting position․ Adjusting your body angle alters the difficulty; a more upright position is easier․ Focus on controlled movements and maintaining core engagement throughout․ This exercise‚ detailed in suspension training guides‚ builds upper body strength and endurance‚ offering a scalable challenge for all fitness levels․

TRX Flyes

TRX Flyes are an excellent exercise for isolating and strengthening the chest muscles‚ utilizing the instability of the suspension trainer to enhance engagement․ Start facing the anchor point‚ holding the handles with palms facing each other and arms extended․ Lean forward‚ maintaining a stable plank position․

Keeping a slight bend in your elbows‚ open your arms out to the sides‚ feeling a stretch in your chest․ Then‚ bring your hands back together in front of your chest‚ squeezing your pectoral muscles․ Control is key; avoid swinging or using momentum․ This exercise‚ often found in comprehensive TRX guides‚ builds chest strength and improves muscular endurance․

Back Exercises

Strengthening the back with a suspension trainer is crucial for posture and overall fitness․ TRX training provides effective exercises targeting various back muscles‚ enhancing both strength and stability․ These exercises are often detailed in comprehensive guides‚ offering variations for different fitness levels․

Focusing on controlled movements‚ you can effectively engage the lats‚ rhomboids‚ and trapezius․ The instability of the TRX forces core engagement‚ adding to the workout’s effectiveness․ From TRX Rows to Bicep Curls utilizing the suspension system‚ a full back workout is achievable‚ building a stronger‚ more resilient physique․

TRX Rows

TRX Rows are a foundational back exercise utilizing bodyweight and the suspension trainer’s instability․ This exercise effectively targets the lats‚ rhomboids‚ and biceps‚ promoting upper back strength and improved posture․ Adjusting your body angle controls the difficulty; the more upright you are‚ the easier the row becomes․

Maintaining a straight line from head to heels is vital‚ engaging the core throughout the movement․ Guides like the “Complete Guide to TRX Suspension Training” detail proper form and variations․ Focus on pulling your elbows back‚ squeezing your shoulder blades together‚ and controlling the eccentric phase for optimal results․

TRX Bicep Curls

TRX Bicep Curls provide a unique challenge to traditional curls‚ leveraging the instability of the suspension trainer to enhance muscle activation․ This exercise primarily targets the biceps brachii‚ while also engaging the forearms and core for stabilization․ Maintaining a consistent body angle is crucial for controlling the intensity․

Keep your elbows fixed and close to your body as you pull upwards‚ focusing on contracting the biceps․ The “Complete Guide to TRX Suspension Training” offers detailed instructions on proper technique and modifications․ Controlled movements and a stable core are essential for maximizing effectiveness and preventing injury during this exercise․

Shoulder Exercises

Shoulder exercises with a suspension trainer effectively build strength and stability in the deltoids and surrounding muscles․ These exercises often utilize the bodyweight resistance offered by the TRX system‚ promoting functional movement patterns․ Variations like TRX Y-Raises and T-Raises target different aspects of shoulder mobility and strength․

The “Complete Guide to TRX Suspension Training” details proper form for these movements‚ emphasizing controlled motions and core engagement․ Maintaining a neutral spine and avoiding excessive momentum are key to preventing injury․ These exercises contribute to improved posture and overall upper body strength‚ enhancing athletic performance and daily function․

TRX Y-Raises

TRX Y-Raises are an excellent exercise for strengthening the rear deltoids‚ rhomboids‚ and lower trapezius muscles – crucial for shoulder stability and posture․ Begin by facing away from the anchor point‚ holding the TRX handles with palms facing each other․ Lean forward‚ maintaining a straight line from head to heels․

Raise your arms out to the sides and upwards‚ forming a “Y” shape with your body․ Focus on squeezing your shoulder blades together throughout the movement․ Control the descent back to the starting position․ Proper form‚ as detailed in suspension training guides‚ prevents injury and maximizes effectiveness‚ building functional strength․

TRX T-Raises

TRX T-Raises effectively target the posterior deltoids‚ rhomboids‚ and trapezius muscles‚ contributing to improved shoulder health and upper back strength․ Start facing away from the anchor point‚ gripping the TRX handles with palms facing each other․ Maintain a slight lean forward‚ keeping your body in a straight line․

Raise your arms out to the sides and upwards‚ forming a “T” shape․ Concentrate on retracting your shoulder blades as you lift‚ engaging the targeted muscle groups․ Slowly lower your arms back to the starting position‚ maintaining control throughout․ As with all TRX exercises‚ proper technique‚ found in comprehensive training resources‚ is vital for optimal results and injury prevention․

Lower Body Exercises

Lower body TRX exercises‚ like squats‚ lunges‚ and hamstring curls‚ build leg strength and stability‚ utilizing bodyweight and the suspension system’s dynamic resistance․

Leg Exercises

TRX leg exercises are incredibly effective for building lower body strength‚ endurance‚ and functional movement patterns․ The instability introduced by the suspension trainer forces greater muscle activation‚ particularly in the quads‚ hamstrings‚ and glutes․

TRX Squats are a foundational exercise‚ challenging balance and requiring core engagement throughout the movement․ Variations include single-leg squats for increased difficulty․ TRX Lunges‚ including forward and crossing balance lunges‚ enhance stability and target each leg individually․

TRX Hamstring Curls effectively isolate the hamstrings‚ promoting flexibility and strength․ Proper form is crucial; heels should be securely placed in the foot cradles‚ and the movement should be controlled to avoid injury․ These exercises‚ detailed in suspension training guides‚ offer a full lower body workout․

TRX Squats

TRX Squats represent a fundamental leg exercise utilizing the suspension trainer‚ significantly enhancing traditional squat mechanics․ The unstable environment demands heightened core engagement and improved balance throughout the entire range of motion․

To perform a TRX Squat‚ maintain a controlled descent‚ keeping your core braced and back straight․ Adjust your body angle to modify the difficulty; the more upright you are‚ the easier the exercise becomes․ Variations include single-leg squats‚ which dramatically increase the challenge to stability and strength․

This exercise‚ detailed in comprehensive suspension training resources‚ effectively targets the quadriceps‚ hamstrings‚ and glutes‚ building lower body strength and functional fitness․ Proper form is paramount to prevent injury and maximize results․

TRX Lunges

TRX Lunges are a dynamic lower body exercise that combines the benefits of a traditional lunge with the added challenge of suspension training‚ demanding significant balance and coordination․ The TRX straps provide assistance and instability‚ forcing greater muscle activation․

Executing a TRX Lunge involves stepping forward into a lunge position while maintaining control of the straps․ Focus on keeping your front knee aligned over your ankle and your core engaged throughout the movement․ Variations‚ like the crossing balance lunge‚ further amplify the stability challenge․

As outlined in complete TRX guides‚ this exercise effectively works the quadriceps‚ hamstrings‚ and glutes‚ contributing to improved lower body strength‚ power‚ and functional movement patterns․ Proper form is crucial for safety and optimal results․

TRX Hamstring Curls

TRX Hamstring Curls are an excellent exercise for isolating and strengthening the hamstring muscles‚ utilizing the unique instability of the suspension trainer․ This exercise requires careful control and a focused mind-muscle connection to maximize effectiveness and prevent injury․

To perform a TRX Hamstring Curl‚ position your heels within the foot cradles of the TRX straps․ Maintaining a straight body line‚ pull your heels towards your glutes‚ engaging your hamstrings throughout the movement․ Remember to control the eccentric phase‚ slowly extending your legs․

As detailed in comprehensive TRX resources‚ proceed lightly‚ as this exercise intensely flexes the hamstrings․ It’s a valuable addition to any full-body TRX workout‚ enhancing lower body strength and flexibility․

Glute Exercises

Glute exercises with a suspension trainer effectively target and strengthen the gluteal muscles‚ contributing to improved hip extension‚ stability‚ and overall lower body power․ These exercises leverage the instability of the TRX to challenge the glutes in a unique and beneficial way․

Key exercises include TRX Hip Extensions‚ where you maintain a straight body line and drive your hips upwards‚ squeezing the glutes at the top of the movement․ Another effective option is TRX Single Leg Glute Bridges‚ increasing the challenge and focusing on unilateral strength․

As highlighted in TRX training guides‚ proper form is crucial for maximizing results and preventing injury․ Incorporating these exercises builds a well-rounded lower body routine․

TRX Hip Extensions

TRX Hip Extensions are a fantastic exercise for isolating and strengthening the gluteal muscles using a suspension trainer․ This movement focuses on hip extension‚ crucial for activities like running‚ jumping‚ and maintaining proper posture․

To perform‚ anchor your feet in the foot cradles‚ maintaining a straight body line from head to heels․ Lean forward slightly‚ keeping your core engaged‚ and then powerfully extend your hips upwards‚ squeezing your glutes at the peak contraction․

Control the descent‚ resisting the pull of the straps․ Variations include single-leg hip extensions for increased difficulty․ Proper form‚ as detailed in TRX guides‚ is vital for maximizing effectiveness and preventing injury․

TRX Single Leg Glute Bridges

TRX Single Leg Glute Bridges represent a challenging yet highly effective exercise for glute activation and core stability‚ utilizing the unique resistance of a suspension trainer․ This exercise builds upon the standard glute bridge‚ adding a significant balance component․

Begin by positioning yourself with your upper back supported on the floor and feet secured in the TRX foot cradles․ Lift one leg towards the ceiling‚ maintaining a straight line from your supporting knee to your shoulder․

Drive through the heel of the grounded foot‚ lifting your hips off the floor‚ squeezing your glutes at the top․ Control the descent․ This exercise‚ often found in comprehensive TRX workout guides‚ demands focused form․

Core Exercises

Core stability is paramount with TRX‚ offering exercises like planks and knee tucks‚ detailed in guides‚ to build functional strength and enhance overall fitness․

Abdominal Exercises

TRX training provides exceptional abdominal engagement through dynamic movements utilizing bodyweight and instability․ The TRX Plank is a foundational exercise‚ demanding full-body stabilization and core activation‚ significantly increasing intensity compared to traditional planks․

Furthermore‚ TRX Knee Tucks introduce a challenging dynamic component‚ requiring controlled hip flexion and core strength to prevent excessive swinging․ These exercises‚ detailed in comprehensive guides‚ build not only abdominal strength but also enhance proprioception and functional fitness․

Variations exist to scale difficulty‚ making them suitable for all fitness levels․ Integrating these exercises into a routine promotes a strong‚ stable core‚ crucial for athletic performance and everyday movements‚ as highlighted in suspension training resources;

TRX Plank

The TRX Plank elevates the traditional plank by introducing instability‚ demanding greater core engagement and full-body stabilization․ Feet are secured in the TRX straps‚ forcing constant adjustments to maintain proper form․ This heightened challenge significantly increases muscle activation in the abdominals‚ obliques‚ and lower back․

Maintaining a straight line from head to heels is crucial‚ preventing sagging or arching of the spine․ Beginners can modify by widening the foot placement for increased stability․ As strength improves‚ foot placement can narrow‚ intensifying the exercise․

Detailed guides emphasize proper technique to maximize benefits and minimize risk of injury‚ making it a cornerstone abdominal exercise within TRX suspension training programs․

TRX Knee Tucks

TRX Knee Tucks are a dynamic core exercise that builds upon the foundational TRX Plank‚ adding a challenging element of controlled movement․ Starting in a plank position with feet in the TRX straps‚ actively draw your knees towards your chest‚ maintaining a stable core and preventing hip rotation․

This exercise intensely targets the lower abdominal muscles‚ requiring significant strength and control․ Focus on initiating the movement from the core‚ rather than relying on momentum․ Modifications include performing slower‚ more controlled tucks or reducing the range of motion․

As highlighted in comprehensive TRX guides‚ proper form is paramount to avoid lower back strain and maximize core engagement during this advanced abdominal exercise․

Advanced Exercises & Considerations

Advanced TRX training integrates tools like medicine balls for increased intensity‚ demanding greater stability and coordination‚ as seen in specialized athletic restoration programs․

TRX Exercises with Medicine Ball Integration

Integrating medicine balls with TRX suspension training significantly elevates workout intensity and challenges core stability․ This advanced technique demands heightened neuromuscular control and coordination‚ pushing beyond traditional bodyweight exercises․ For example‚ performing a TRX chest press while simultaneously rotating with a medicine ball engages more muscle groups and improves functional strength․

Similarly‚ incorporating a medicine ball during TRX rows adds resistance and forces greater stabilization of the core and back muscles․ These combinations are particularly beneficial for athletes seeking to enhance power and endurance․ Remember to prioritize proper form and controlled movements when adding the medicine ball to avoid injury and maximize effectiveness․ This approach builds upon the foundational benefits of TRX‚ creating a dynamic and challenging full-body workout․

Safety Recommendations for TRX Training

Prioritizing safety is crucial when utilizing TRX suspension trainers․ Always inspect the straps and anchors before each workout‚ ensuring they are securely fastened and in good condition․ Begin with foundational exercises and master proper form before progressing to more advanced movements․ Maintain a controlled tempo throughout each exercise‚ avoiding jerky or rushed motions․

Engage your core throughout every exercise to maintain stability and prevent lower back strain․ Listen to your body and stop if you experience any pain․ The “Complete Guide to TRX Suspension Training” emphasizes variations and safety recommendations‚ offering valuable guidance․ Consider working with a certified trainer initially to learn correct techniques and minimize the risk of injury․ Proper setup and mindful execution are key to a safe and effective TRX workout;

faac 400 manual

FAAC 400 Manual: Comprehensive Guide

This comprehensive guide details the FAAC 400, a hydraulic swing gate opener, following FAAC’s significant 100 million Euro acquisition from ASSA ABLOY.

The FAAC 400 is a robust and reliable hydraulic swing gate operator designed for both residential and commercial applications. This manual serves as a complete resource for understanding, installing, operating, and maintaining your FAAC 400 system. Recent news highlights FAAC’s substantial growth, underscored by their 100 million Euro acquisition of a portion of ASSA ABLOY’s automatic pedestrian door business – a landmark deal in FAAC’s history.

Perfect for diverse settings like apartments, subdivisions, commercial properties, condos, and industrial sites, the FAAC 400 prioritizes quiet operation, enhanced security through a key-protected manual release, and long-term reliability thanks to its self-lubrication system. This guide will walk you through each step, ensuring a smooth and successful experience with your new gate operator.

Overview of FAAC and its Acquisition of ASSA ABLOY’s Pedestrian Door Business

FAAC is a global leader in access automation, renowned for innovative solutions in gate and door control systems. Recently, FAAC significantly expanded its portfolio with the acquisition of a segment of ASSA ABLOY’s automatic pedestrian door business for 100 million Euros. This strategic move, representing approximately 93 million Euros in sales and encompassing 600 employees, marks the largest acquisition in FAAC’s history, bolstering its position in the access control market.

This acquisition demonstrates FAAC’s commitment to growth and diversification. By integrating ASSA ABLOY’s expertise, FAAC aims to enhance its product offerings and provide even more comprehensive solutions to customers; The FAAC 400 benefits from this broader technological base, ensuring continued innovation and quality in its design and functionality.

Key Features of the FAAC 400 Gate Operator

The FAAC 400 is a robust hydraulic swing gate operator designed for residential, commercial, and industrial applications. A standout feature is its quiet operation, ensuring minimal disturbance. Security is enhanced by a key-protected manual release, allowing for operation during power outages while preventing unauthorized access. Furthermore, the 400 boasts a self-lubrication system, reducing maintenance requirements and extending the operator’s lifespan.

This operator is capable of handling swing gates up to 16 feet in length. Installation is streamlined thanks to a pre-assembled control unit. Crucially, the FAAC 400 incorporates an anti-crushing safety system, utilizing electronic torque control for enhanced user protection. It’s a reliable and feature-rich solution for automated gate access.

Installation and Setup

Proper installation of the FAAC 400 requires careful attention to component checklists, mounting procedures, wiring diagrams, and precise control unit setup.

Unboxing and Component Checklist

Upon receiving your FAAC 400 gate operator, carefully inspect the packaging for any signs of damage during transit; Once opened, verify all components are present against the included checklist. Essential items should include: the hydraulic operator arm, control unit (pre-mounted for quick installation), two remote controls, a key for manual release, mounting hardware (brackets, bolts, and screws), and this comprehensive user manual.

Confirm the presence of all wiring connectors and any necessary adapters. Missing components should be reported to your supplier immediately. Retain the original packaging for potential returns or warranty claims. A thorough unboxing and component check ensures a smooth and efficient installation process, preventing delays and potential issues later on.

Mounting the FAAC 400: Step-by-Step Instructions

Begin by securely attaching the mounting brackets to both the gate post and the gate itself, ensuring proper alignment and stability. Utilize the provided hardware, tightening bolts to the manufacturer’s specified torque. Next, position the FAAC 400 operator arm onto the brackets, verifying free movement throughout the gate’s arc.

Connect the operator arm to the gate leaf, again confirming secure fastening. Double-check all connections for tightness and stability before proceeding. Important: Ensure the gate swings freely without obstruction. Proper mounting is crucial for safe and reliable operation. Refer to the detailed diagrams in this manual for visual guidance throughout the process.

Wiring Diagram and Electrical Connections

Caution: Disconnect power before commencing any electrical work! Refer to the detailed wiring diagram included in this manual for precise connections. Connect the power supply wires to the designated terminals on the control unit, observing correct polarity. Wire the safety devices – photocells and edge sensors – to their respective inputs, ensuring proper functionality.

Connect any optional accessories, such as keypads or intercom systems, following the diagram. Secure all wiring connections with appropriate connectors and ensure wires are neatly organized and protected. Verify all connections before restoring power. Incorrect wiring can damage the system and void the warranty.

Setting Up the Control Unit

Initial Setup: After wiring, power on the control unit. The initial setup involves programming the operating limits, opening and closing speeds, and any desired timer functions. Utilize the control panel interface to navigate the menu and adjust these parameters according to your specific gate requirements.

Carefully set the opening and closing limits to prevent over-travel. Program the timer functions to automatically close the gate after a set period. Ensure all settings are accurately configured before proceeding to testing. Refer to the advanced settings section for detailed instructions on customizing these features.

Operation and Functionality

The FAAC 400 offers reliable swing gate operation, featuring a user-friendly control panel, manual release, and a self-lubrication system for longevity.

Understanding the Control Panel Interface

The FAAC 400 control panel is the central hub for managing gate operation and settings. Its interface provides access to crucial functions, including programming timer settings, adjusting opening and closing speeds, and integrating with external access control systems.

Typically, the panel features an LCD screen displaying current status and menu options. Navigation is usually achieved through a combination of buttons – often including ‘Menu’, ‘Enter’, ‘Up’, and ‘Down’ arrows. Users can cycle through menus to configure parameters like pedestrian mode, safety features, and remote control programming.

Understanding the icons and terminology is key; the manual provides detailed explanations of each function. The control panel allows for customization to suit specific needs, ensuring optimal performance and security for the automated gate system.

Manual Release and Key Protection

The FAAC 400 incorporates a key-protected manual release, a vital safety and operational feature. This allows for manual operation of the gate in the event of power failure or system malfunction. Access to the manual release is secured with a dedicated key, preventing unauthorized operation and ensuring security.

To disengage the motor, the key is inserted and turned, unlocking the mechanism. This enables the user to physically move the gate, providing access or egress. It’s crucial to re-engage the motor after manual operation, using the key to return the system to automated control.

Regularly testing the manual release is recommended to ensure functionality. The key should be stored securely when not in use, maintaining the system’s overall security and preventing accidental or malicious manual operation.

Self-Lubrication System Explained

The FAAC 400 boasts a sophisticated self-lubrication system, designed to minimize maintenance and ensure long-term, reliable operation. This integrated system automatically delivers lubricant to critical components, reducing friction and wear within the hydraulic mechanism.

Unlike traditional systems requiring periodic manual lubrication, the FAAC 400’s self-lubrication feature extends the intervals between servicing. This translates to reduced downtime and lower maintenance costs for the operator.

The system utilizes a reservoir of specialized hydraulic oil, which is circulated throughout the gate operator. Regularly checking the oil level is still recommended, although the frequency is significantly reduced compared to non-self-lubricating models. This innovative feature contributes to the FAAC 400’s reputation for durability and ease of use.

Swing Gate Operation Limits (Up to 16 Feet)

The FAAC 400 is engineered to efficiently operate swing gates up to 16 feet in length. This capability makes it suitable for a wide range of residential and commercial applications, from securing driveways to controlling access points in larger properties.

However, optimal performance depends on several factors, including gate weight, wind conditions, and proper installation. The control unit allows for adjustable opening and closing limits, ensuring the gate travels the desired distance and avoids collisions.

Careful programming of these limits is crucial during setup. Exceeding the 16-foot limit or improper adjustment can strain the operator and potentially void the warranty. Always consult the installation manual for detailed instructions on setting appropriate operating parameters.

Safety Features

The FAAC 400 prioritizes safety with features like anti-crushing torque control, obstacle detection, emergency stops, and key-protected manual release mechanisms.

Anti-Crushing System: Torque Control

The FAAC 400 incorporates a sophisticated anti-crushing system centered around precise torque control. This electronic device directly monitors the gate’s force during operation, immediately halting and reversing movement upon detecting resistance. This crucial safety feature prevents potential injuries to people or damage to vehicles. The system continuously adjusts, ensuring optimal performance while maintaining a high level of safety.

Unlike simpler mechanical systems, the FAAC 400’s torque control is highly sensitive and responsive. It’s designed to differentiate between a legitimate obstruction and normal operational forces, minimizing false triggers. Regular testing and calibration of this system are recommended to guarantee its continued effectiveness, safeguarding users and property. This proactive approach to safety is a hallmark of the FAAC 400 design.

Obstacle Detection and Reversal Mechanisms

The FAAC 400 gate operator utilizes advanced obstacle detection coupled with automatic reversal mechanisms to enhance safety. Beyond the torque control system, the operator is designed to recognize obstructions in the gate’s path during both opening and closing cycles. Upon detection, the gate immediately stops and reverses direction, preventing potential impacts.

This system relies on sensitive sensors and sophisticated algorithms to accurately identify obstacles, differentiating between minor debris and significant obstructions. Regular inspection of these sensors is vital to ensure optimal functionality. The reversal mechanism is a critical safety component, providing an additional layer of protection alongside the anti-crushing torque control. Proper maintenance and testing of these features are essential for safe operation.

Emergency Stop Functionality

The FAAC 400 is equipped with a dedicated emergency stop functionality, providing an immediate halt to gate operation in critical situations. This feature is paramount for safety, allowing for rapid intervention in case of unforeseen circumstances or emergencies. Typically, this is implemented via a clearly marked and easily accessible emergency stop button, often located near the control unit or gate access points.

Activating the emergency stop immediately de-energizes the motor, bringing the gate to a complete standstill. Following an emergency stop, a manual reset is required to restore normal operation, preventing accidental reactivation. Regular testing of the emergency stop button is crucial to verify its responsiveness and ensure it functions correctly when needed. This is a vital safety check during routine maintenance.

Safety Considerations During Installation

Prioritizing safety during the FAAC 400 installation is absolutely critical. Always disconnect the power supply before commencing any electrical work to prevent electric shock. Ensure the gate and surrounding area are clear of obstructions and personnel during the installation process. Proper grounding is essential to prevent electrical hazards and ensure the system functions correctly.

Carefully follow the wiring diagrams and instructions, verifying all connections before restoring power. The gate’s physical structure must be robust and capable of withstanding the forces exerted by the operator. Adhere to local building codes and safety regulations throughout the installation. Regularly inspect all mounting hardware and components for tightness and integrity post-installation.

Troubleshooting and Maintenance

Addressing common issues and adhering to a regular lubrication schedule ensures optimal performance and longevity of your FAAC 400 gate operator system.

Common Issues and Solutions

Gate not responding: First, verify the power supply to the control unit. Check for tripped breakers or blown fuses. If power is confirmed, inspect the remote control batteries and ensure proper programming. Slow operation: This often indicates a need for lubrication – refer to the maintenance schedule. Also, check for obstructions hindering gate movement.

Gate reversing unexpectedly: The anti-crushing system or obstacle detection might be overly sensitive. Adjust the torque settings carefully. Control panel errors: Consult the error code list in the manual to diagnose the specific issue. Resetting the control unit can sometimes resolve minor glitches. Manual release issues: Ensure the key is fully engaged and turned correctly. If still problematic, professional assistance may be required.

Regularly inspecting wiring connections and ensuring proper alignment of the gate are crucial preventative measures.

Resetting the FAAC 400 Control Unit

Performing a reset can resolve minor operational issues. Begin by ensuring the gate is clear of obstructions and personnel. Locate the reset button on the control unit – its position is detailed in the unit’s diagram. Press and hold the reset button for approximately five seconds, until you observe a visual confirmation, such as a flashing LED indicator.

Following the reset, the control unit will initiate a self-test sequence. Allow this process to complete uninterrupted. You may need to reprogram the remote controls and re-establish any customized settings, like timer functions or opening/closing speeds;

Caution: A full reset will revert all settings to factory defaults. Document your existing configurations before resetting to simplify the restoration process. If issues persist after resetting, consult a qualified technician.

Lubrication Schedule and Procedures

Maintaining proper lubrication is crucial for the FAAC 400’s longevity and smooth operation. A regular schedule prevents wear and tear on moving parts. Every six months, inspect and lubricate all pivot points, hinges, and the hydraulic cylinder with a high-quality, lithium-based grease.

Avoid over-lubrication, as excess grease can attract dirt and debris. Specifically, focus on the gate arm’s articulation points and the internal mechanisms of the operator. Use a grease gun for precise application.

Annual inspection should include a thorough cleaning of all lubricated areas before re-application. Do not use WD-40 or similar penetrating oils, as they can damage seals. Refer to the parts diagram for specific lubrication points.

Checking and Adjusting Operating Limits

Properly set operating limits ensure the FAAC 400 gate travels the desired distance, preventing collisions and strain on the system. Begin by visually inspecting the gate’s full open and closed positions. Access the control unit’s programming menu to view the current limit settings.

Slowly adjust the open and close limits in small increments, observing the gate’s movement after each adjustment. Utilize the control panel’s test functions to simulate full gate cycles. Ensure the gate doesn’t exceed its 16-foot operational capacity during testing.

Verify that the limits are consistent and repeatable. If adjustments are difficult, check for obstructions or mechanical binding. Document the final limit settings for future reference and maintenance.

Advanced Settings and Customization

Unlock the FAAC 400’s full potential through programmable timers, adjustable speeds, access system integration, and convenient remote control programming options.

Programming the Timer Functions

The FAAC 400 control unit allows for sophisticated timer programming, enhancing security and convenience. Users can establish specific opening and closing schedules tailored to their needs, ideal for managing access during business hours or restricting entry during off-peak times. Programming involves navigating the control panel interface to set start and end times for automated operation.

Multiple timer settings can be configured, accommodating diverse schedules. For example, different schedules can be implemented for weekdays versus weekends, or for seasonal variations. The system supports both absolute time settings (e.g., 8:00 AM) and relative time settings (e.g., 30 minutes after sunset). Careful planning of these timer functions optimizes gate operation and contributes to a robust security system. Remember to save all changes to the control unit’s memory.

Adjusting Opening and Closing Speeds

The FAAC 400 allows users to customize gate operation by adjusting both opening and closing speeds. These adjustments are made through the control panel, offering precise control over the gate’s movement. Slower speeds are recommended for environments with higher pedestrian traffic or sensitive surroundings, prioritizing safety and reducing impact force. Faster speeds can be utilized when quicker access is desired and safety isn’t compromised.

It’s crucial to make incremental adjustments and thoroughly test the gate’s operation after each change. Observe the gate’s behavior to ensure smooth and consistent movement throughout the entire range of motion. Avoid setting excessively high speeds, as this could strain the motor or compromise safety features. Always refer to the safety guidelines within this manual before altering speed settings.

Integrating with Access Control Systems

The FAAC 400 gate operator is designed for seamless integration with a variety of access control systems, enhancing security and convenience. This includes compatibility with keypads, card readers, intercom systems, and remote control receivers. Integration typically involves connecting the access control system’s output relays to the designated input terminals on the FAAC 400 control unit.

Proper wiring and configuration are essential for successful integration. Consult the access control system’s documentation and the FAAC 400 wiring diagram to ensure correct connections. Advanced systems can allow for customized access permissions, time-based access restrictions, and remote monitoring capabilities. Always test the integration thoroughly after installation to verify proper functionality and security.

Remote Control Programming

Programming remote controls for the FAAC 400 gate operator is a straightforward process, typically involving the control unit’s programming button. Locate the “Learn” or “Program” button on the control panel. Press and release this button to initiate the learning mode. Then, simultaneously press and hold the desired button on the remote control until the gate operator acknowledges the signal – usually with a flashing light or audible beep.

Repeat this process for each additional remote control. Some models may support multiple channels for controlling different gates or functions. Refer to the FAAC 400 manual for specific instructions and troubleshooting tips. Ensure the remote control batteries are fresh for optimal performance and range.

Technical Specifications

The FAAC 400 is a CBAC standard hydraulic swing gate opener arm, designed for reliable operation and featuring specific power and dimension requirements.

FAAC 400 Hydraulic Swing Gate Opener Specifications

The FAAC 400 is engineered as a robust hydraulic swing gate operator, specifically a CBAC standard model. It’s designed to handle gates up to 16 feet in length, making it suitable for residential, commercial, and industrial applications. This operator boasts quiet operation and features a key-protected manual release for enhanced security and functionality.

Key specifications include its hydraulic mechanism, ensuring smooth and reliable gate movement. The unit incorporates a self-lubrication system, minimizing maintenance requirements and extending its operational lifespan. Its construction prioritizes durability and consistent performance, even under demanding conditions. The FAAC 400 is a testament to FAAC’s commitment to quality and innovation in gate automation technology.

Power Requirements and Consumption

The FAAC 400 hydraulic swing gate operator requires a standard power supply to function optimally. While specific voltage requirements may vary based on regional standards and the control unit configuration, it generally operates on a 230V AC power source. It’s crucial to verify compatibility with local electrical systems before installation.

Power consumption is relatively efficient, particularly considering its hydraulic operation and capacity to manage substantial gate weights. Standby power draw is minimal, contributing to energy savings. During gate operation – opening and closing – consumption increases proportionally to the gate’s size and weight. Detailed power consumption figures are available in the full technical documentation for precise calculations.

Operating Temperature Range

The FAAC 400 hydraulic swing gate operator is engineered for reliable performance across a broad spectrum of environmental conditions. However, maintaining optimal functionality requires adherence to specified temperature limits. Generally, the FAAC 400 is designed to operate effectively within a temperature range of -20°C to +55°C (-4°F to +131°F).

Operating outside this range, particularly at extreme temperatures, can impact the hydraulic fluid’s viscosity, potentially affecting gate speed and smoothness. Prolonged exposure to temperatures beyond these limits may compromise the longevity of components. It’s advisable to consult the complete technical specifications for precise details and recommendations regarding operation in particularly harsh climates.

Dimensions and Weight

Understanding the physical specifications of the FAAC 400 is crucial for proper installation and ensuring compatibility with existing infrastructure. The overall dimensions of the hydraulic swing gate opener are compact, designed for discreet integration. While specific measurements vary slightly depending on the configuration, the main unit typically measures approximately 300mm (length) x 200mm (width) x 250mm (height).

The weight of the FAAC 400 unit itself is around 10kg (22lbs). However, the complete installed system weight, including the arm and mounting hardware, will be considerably higher. Accurate weight and dimension data are vital for structural support calculations and safe handling during installation. Refer to the detailed technical documentation for precise figures;

tv guide panama city beach fl

TV Guide Panama City Beach, FL: A Comprehensive Guide (Updated May 3, 2026)

Discover Panama City Beach’s entertainment options! This guide details local TV, streaming, and interactive features, including HGTV schedules from December 13, 2025.

Understanding Local TV Options

Panama City Beach residents and visitors have a diverse range of television viewing choices. Beyond traditional over-the-air broadcasts, options include cable and satellite providers offering extensive channel lineups. Streaming services are increasingly popular, providing on-demand access to a vast library of content.

Local programming often features community events and weekly competitions drawing significant participation – currently around 60 players each week. Understanding these options is crucial for maximizing your entertainment experience. Interactive TV solutions and customizable jukeboxes further enhance viewing possibilities. Exploring these avenues ensures you stay connected to both national and local broadcasts, alongside personalized entertainment choices.

Cable and Satellite Providers

Several cable and satellite providers service the Panama City Beach area, offering tiered packages to suit various budgets and viewing preferences. These providers typically bundle television service with internet and phone options, creating comprehensive home entertainment solutions.

Commonly available channels include local broadcasts, national networks, sports channels, news outlets, and family entertainment options. Many providers also offer on-demand services, allowing viewers to access a wide selection of movies and TV shows at their convenience. Comparing packages and promotional offers is recommended to find the best value and channel lineup for your needs, ensuring a tailored viewing experience.

Local Broadcast Channels Available

Panama City Beach residents have access to a range of free, over-the-air broadcast channels. These typically include major networks like ABC, CBS, NBC, and FOX, providing access to national news, entertainment programming, and local coverage.

PBS also broadcasts educational and cultural content. Signal strength can vary depending on location and antenna quality, so an HD antenna is often recommended for optimal reception. Local channels frequently broadcast community events and provide vital information during emergencies. Checking a TV guide or utilizing a digital tuner will reveal the specific channel numbers and programming schedules available in your area.

Streaming Services in Panama City Beach

Panama City Beach offers a wealth of streaming options, supplementing traditional TV. Popular services like Netflix, Hulu, Disney+, and Amazon Prime Video provide on-demand movies and series. For live TV, services like YouTube TV, Sling TV, and FuboTV offer channel packages similar to cable.

These platforms often include local channels and sports networks. Many require a stable internet connection for optimal viewing. Interactive TV and music/video streaming solutions are also gaining traction, offering customizable entertainment experiences. Consider bundling options or utilizing free trials to find the best fit for your viewing preferences and budget.

Finding TV Listings

Explore online TV guide websites, provider’s on-demand features, and mobile apps to easily locate showtimes and channel information in Panama City Beach.

Online TV Guide Websites

Numerous websites offer comprehensive TV listings for Panama City Beach, Florida. These platforms allow users to search by channel, time, or program title, providing detailed schedules for both current and future broadcasts. Popular options include websites dedicated to national programming, as well as those focusing on local channels and events.

Many of these sites feature user-friendly interfaces, customizable viewing preferences, and the ability to set reminders for favorite shows. Beyond basic listings, some websites offer episode guides, cast information, and reviews, enhancing the overall television viewing experience. Regularly updated schedules ensure accuracy, keeping residents and visitors informed about what’s airing when.

Utilizing Provider’s On-Demand Features

Cable and satellite providers in Panama City Beach offer extensive on-demand libraries, providing viewers with a vast selection of movies, TV shows, and sporting events accessible at their convenience. These services often include both free on-demand content and premium options available for rental or purchase.

Many providers integrate on-demand features directly into their TV guide interfaces, simplifying navigation and discovery. Utilizing these features eliminates the need to adhere to fixed broadcast schedules, allowing viewers to watch programs when it suits them best. Interactive TV options further enhance this experience, offering personalized recommendations and streamlined access to desired content.

Mobile Apps for TV Listings

Staying informed about TV schedules in Panama City Beach is easier than ever with dedicated mobile applications. These apps provide up-to-date listings for local broadcast channels, cable, and satellite providers, directly on your smartphone or tablet. Many apps offer personalized recommendations based on your viewing preferences, ensuring you never miss a favorite show.

Furthermore, some apps integrate with streaming services, consolidating all your entertainment options in one convenient location. Features like program reminders and the ability to browse on-demand content enhance the viewing experience. Utilizing these mobile apps provides flexibility and control over your TV schedule, wherever you are.

Popular Channels & Programming

Panama City Beach viewers enjoy diverse programming, from sports events and local news to family entertainment and movies – a wide range of options!

Sports Channels & Events

For sports enthusiasts in Panama City Beach, a variety of channels deliver thrilling action. Expect comprehensive coverage of major league baseball, football, basketball, and hockey, depending on seasonal schedules. Local sports bars frequently host viewing parties, amplifying the excitement of big games.

Weekly competitions drawing 60 players suggest a vibrant local sports scene potentially covered by regional broadcasts. Keep an eye on local news channels for updates on high school and college sports events happening in the area. Streaming services also provide access to specialized sports networks and live events, offering flexibility for fans.

News Channels & Local Coverage

Panama City Beach residents have access to numerous news channels providing both national and local coverage. Expect updates on community events, weather reports crucial for beachgoers, and traffic information, especially during peak tourist seasons. Local broadcasts often highlight happenings around Pier Park and other attractions.

Community events are frequently broadcast on local TV, fostering a sense of connection. Stay informed about potential impacts from tourism in the Bocas del Toro district, which may influence local news. Reliable news sources are vital for staying current on important developments within the Panama City Beach area.

Family Entertainment & Movie Channels

Panama City Beach offers a wide array of family entertainment and movie channels through cable, satellite, and streaming services. Expect options ranging from classic animated films to the latest blockbuster releases, catering to all ages. Many providers feature on-demand libraries with extensive movie selections.

Interactive TV options and jukebox solutions enhance the viewing experience, providing customizable entertainment. Consider channels showcasing home improvement and lifestyle content, like HGTV, with detailed schedules available (e.g., December 13, 2025). These channels offer engaging programming for the whole family to enjoy during downtime.

Beyond Traditional TV: Interactive Entertainment

Explore Panama City Beach’s interactive TV and customizable jukebox solutions for music and video streaming, enhancing your entertainment beyond standard cable options.

Interactive TV Options in Panama City Beach

Panama City Beach is embracing a new wave of entertainment, moving beyond passive viewing with innovative interactive TV solutions. Residents and visitors can now enjoy customizable experiences tailored to their preferences. These options include advanced on-demand services offered by cable and satellite providers, allowing viewers to select and watch content at their convenience.

Furthermore, the area features sophisticated jukebox solutions that integrate music and video streaming, creating a dynamic and personalized atmosphere. This trend is particularly popular in local establishments, enhancing the overall entertainment experience. The community-wide competitions, drawing around 60 players weekly, also demonstrate a growing appetite for interactive engagement, potentially linked to TV coverage and participation.

Jukebox Solutions & Music/Video Streaming

Panama City Beach venues are increasingly integrating customizable jukebox solutions, offering patrons a dynamic entertainment experience. These systems go beyond traditional music selection, often incorporating high-definition video streaming capabilities, creating a vibrant atmosphere. This trend caters to diverse tastes, allowing users to curate playlists and enjoy visual content alongside their favorite tunes.

The availability of these interactive systems complements the broader range of TV and streaming options in the area. They represent a shift towards personalized entertainment, where consumers have greater control over their viewing and listening experiences. This integration of music and video enhances the social aspect of local establishments, fostering a lively and engaging environment.

Local Events & TV Tie-Ins

Panama City Beach hosts weekly competitions drawing 60 players, often with local TV coverage, alongside community events frequently broadcast on local channels.

Community Events Broadcast on Local TV

Panama City Beach actively utilizes local television to showcase its vibrant community spirit. Numerous events, from beachfront festivals and holiday parades to local school sporting competitions, receive coverage on area channels. This provides residents and visitors alike with a convenient way to stay informed and connected to happenings around town.

The broadcasts aren’t limited to simply showing the events; they often include interviews with organizers and participants, adding a personal touch. Local news stations frequently highlight these gatherings, promoting community engagement and fostering a sense of belonging. Check local listings for schedules and specific event coverage details. These televised events truly capture the essence of Panama City Beach’s lively atmosphere.

Weekly Competitions & TV Coverage

Panama City Beach has cultivated a thriving competitive scene, drawing approximately 60 players each week to various local contests. These aren’t just casual gatherings; they’ve evolved into community-wide competitions, gaining significant local attention. A notable aspect is the increasing television coverage these events receive.

Local channels are actively broadcasting highlights and full coverage of these weekly showdowns, providing a platform for participants and a source of entertainment for viewers. This exposure not only celebrates local talent but also boosts community morale. Check your local TV guide for specific times and channels broadcasting these exciting weekly competitions – a true testament to Panama City Beach’s spirited community.

Panama City Beach Area Information

Explore Pier Park and local attractions! Nearby Pebrier Beach offers a clean, less crowded experience just 3;6 km from Vaudoix’s center.

Pier Park & Local Attractions

Pier Park, a premier shopping and entertainment destination, anchors much of the Panama City Beach experience. Beyond retail therapy, visitors can enjoy diverse dining options and frequent community events often broadcast on local television. This vibrant hub frequently hosts competitions drawing around 60 participants weekly, potentially gaining local TV coverage.

Beyond Pier Park, Panama City Beach boasts stunning natural beauty. Consider a day trip to nearby Pebrier Beach, described as a smaller, cleaner, and less crowded alternative located just 3.6 kilometers from Vaudoix’s center. While not directly related to TV listings, exploring these attractions enhances your overall Panama City Beach visit, providing content for local news and potentially featured segments.

Bocas del Toro District Tourism (Related Travel)

While focused on Panama City Beach TV guides, exploring nearby destinations enriches your travel experience. The Bocas del Toro district, part of Panama, is a significant tourism hub renowned for its beautiful beaches, islands, and diverse activities like scuba diving. This region’s appeal often translates to travel features on international channels accessible via streaming services in Panama City Beach.

Consider Bocas del Toro for a longer vacation, potentially discovering local Panamanian television programming. Though geographically distant, travel shows and documentaries showcasing Bocas del Toro’s attractions may air on channels available through cable, satellite, or on-demand services, complementing your Panama City Beach viewing options.

Pebrier Beach (Nearby Beach Information)

Though our focus is Panama City Beach television, understanding nearby attractions enhances your visit. Pebrier Beach, located in Vaudoix, offers a quieter, less crowded beach experience. Described as clean and just 3.6 km from the center of Vaudoix, it presents a peaceful alternative to busier locales.

While not directly related to TV listings, knowing about nearby beaches like Pebrier allows for a well-rounded vacation. Local news channels in Panama City Beach might occasionally feature segments on regional tourism, potentially including coverage of beaches like Pebrier, accessible through local broadcasts or streaming services.

Resources for Further Information

Explore HGTV’s December 13, 2025 schedule, gourmet guides for Spanish cities, and educational resources – enriching your Panama City Beach experience!

HGTV Channel Schedule (December 13, 2025 Example)

Planning your viewing on December 13, 2025? Here’s a sample HGTV schedule to inspire your home improvement dreams. Starting at 6:00 AM, “House Hunters” kicks off the day, followed by back-to-back episodes of “Property Brothers” at 7:00 AM and 8:00 AM. Mid-morning brings “Fixer Upper” at 9:00 AM, perfect for design inspiration.

The afternoon features “Good Bones” at 1:00 PM and “Home Town” at 2:00 PM. For evening entertainment, catch “Flip or Flop” at 6:00 PM and a new episode of “Christina on the Coast” at 7:00 PM. Rounding out the night is “Love It or List It” at 8:00 PM. This is just a glimpse; check local listings for precise times and channel availability in Panama City Beach!

Local Restaurant & Gourmet Guides (Alicante, Murcia, Valencia, Marbella, Madrid ー Related Travel)

Dreaming of a culinary escape? While focused on Panama City Beach TV guides, exploring Spain’s gastronomic delights offers a delightful parallel. Discover Alicante’s fresh seafood, Murcia’s hearty cuisine, and Valencia’s paella traditions. Marbella boasts luxury dining, while Madrid presents a vibrant tapas scene.

These guides – covering Alicante, Murcia, Valencia, Marbella, and Madrid – provide curated lists of restaurants, gourmet shops, and luxury services. Perfect for planning a future vacation, or simply indulging in armchair travel while enjoying your favorite shows. Tu guía de gastronomía awaits your exploration!

Educational Resources & Language Learning (General Reference)

Enhance your downtime! While navigating the Panama City Beach TV landscape, consider expanding your horizons with educational resources. The provided text references “Disciplina Иностранны язык,” highlighting the importance of language learning. Numerous online platforms offer courses in Spanish, and many other languages, complementing your entertainment.

Explore resources for dissertation advice, degree attainment, and certification – valuable for personal and professional growth. These general references can enrich your leisure time, offering intellectual stimulation alongside your favorite TV programs. Continuous learning is a rewarding companion to relaxing entertainment!